Malware analysis is “the process of understanding the behaviour and purpose of a suspicious file or URL” (CrowdStrike). This process lets a blue team member (SOC analyst, incident responder, etc.) effectively triage an incident and uncover IOCs (Indicators of Compromise) which allow them to mitigate a threat. It can also prove valuable in the threat hunting realm as a hunter can proactively search for TTPs (tactic/techniques/procedures) related to the discovered malware.
Malware analysis can be divided into two broad categories; static and dynamic.
Static Malware Analysis
In static analysis you look at the malware without executing it.
- What’s the executable’s hash?
- What are it’s strings?
- What is in it’s PE header?
- What does the executable’s disassembly look like?
All questions which can give indicators of the malware’s functionality and family.
Dynamic Malware Analysis
Next, you move onto dynamic analysis where you execute the malware and see what happens. Generally, you look for host-based and network-based IOCs which a triggered when a malware sample is executed.
For instance, host-based indicators could be; files encrypted, processes created/killed, or tasks scheduled (e.g. persistence mechanisms). Whereas network-based indicators include; connections made, ports opened, or DNS requests sent. These indicators often overlap (e.g. a port being opened on the host) but are a useful construct to guide an analyst in what to look for.
It can be helpful to think of malware analysis like bomb disposal. Static analysis would be looking at the bomb and reading the sticker on the outside that says “Made by ACME”. Dynamic analysis would be blowing up the bomb and seeing how big the boom is or what chemicals it deposits once detonated. Also, like bomb disposal, malware analysis should be performed in a safe and controlled manner.
Note, my knowledge of bomb disposal may be limited.
Malware Analysis Environment
To perform malware analysis in a safe and controlled manner, a lab environment needs to be created and configured. Some requirements of a basic lab environment are:
- Not allowing the detonated malware to escape and have adverse effects on other systems.
- Being able to capture all network and host based indicators of the malware which is detonated.
- Including a victim machine that mimics a target machine to ensure that the malware detonates and any potential anti-analysis techniques are bypassed (e.g. if the malware is designed to not run in a virtual environment this must be bypassed for effective analysis).
- Having this victim machine easily reproducible so that after a detonation a new, clean victim machine can be used.
These basic requirements are ones which any malware analysis environment will need to fulfil in order to be safe and effective. I have found the process of creating a analysis environment to be an iterative adventure where as one learns more about malware and how to analyse it, one adds new and interesting components to their analysis environment.
However, the fundamentals mentioned above are required by all and are a good starting point. As such, this article walks you through how I created my base environment and leaves room for you to build on top of it.
Environment Creation
Resources required:
- Proxmox (version 7.1–7 in this demo) virtualisation software
- REMnux (version 7 in this demo) Linux malware analysis virtual machine
- Flare-VM (version 3.0 in this demo) Windows malware analysis virtual machine
- pfSense (version 2.6.0-RELEASE in this demo) firewall software
I created my malware analysis lab inside my virtualised home lab infrastructure. For my home lab I currently use the Proxmox virtualisation management platform. This is a type 1 hypervisor which you use to run multiple virtual machines (VMs) on a dedicated server/workstation. Proxmox allows me to create multiple virtual environments for multiple use cases (e.g. for active directory exploitation, for development, for threat hunting, etc.) all on one machine and within one easy to manage interface. I’d highly recommend it for any tinkerer or avid IT professional.
A philosophy I have come to adopt when managing my Proxmox environments is one pool = one bridge = one network = one purpose = one environment, from this Medium article. This basically means that each environment will have one pool of resources and one network it’s VMs will use that will connect via the same bridge to a pfSense firewall for easy management.
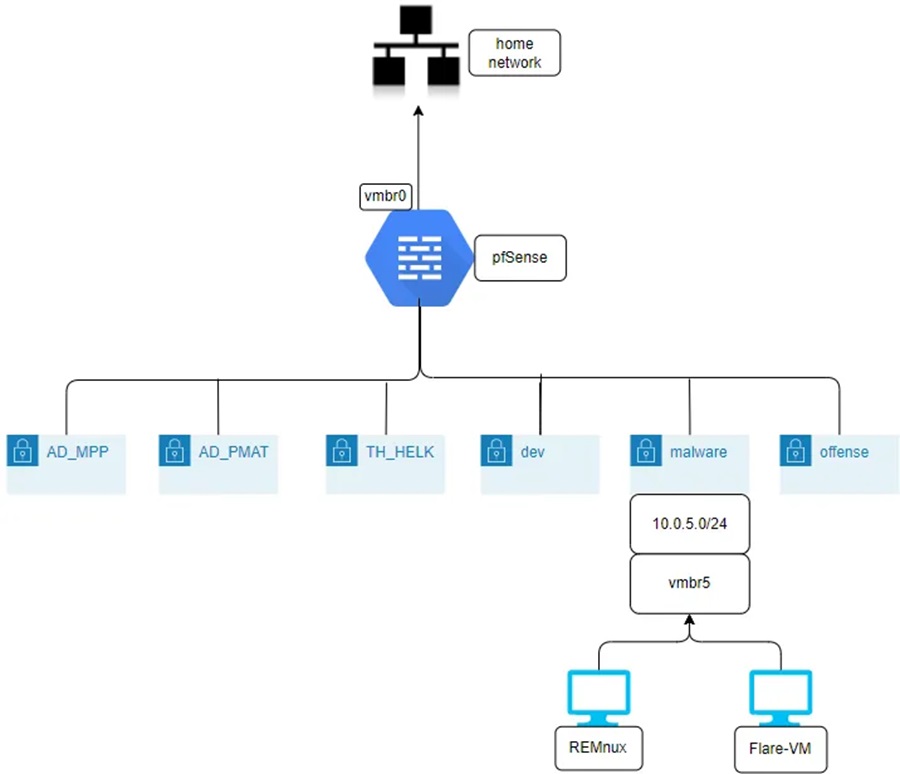
The process of creating this management framework of pools, bridges, and subnets can be found in my Virtualised all the Things article. For now I’ll assume you have the following configured:
A malware resource pool:

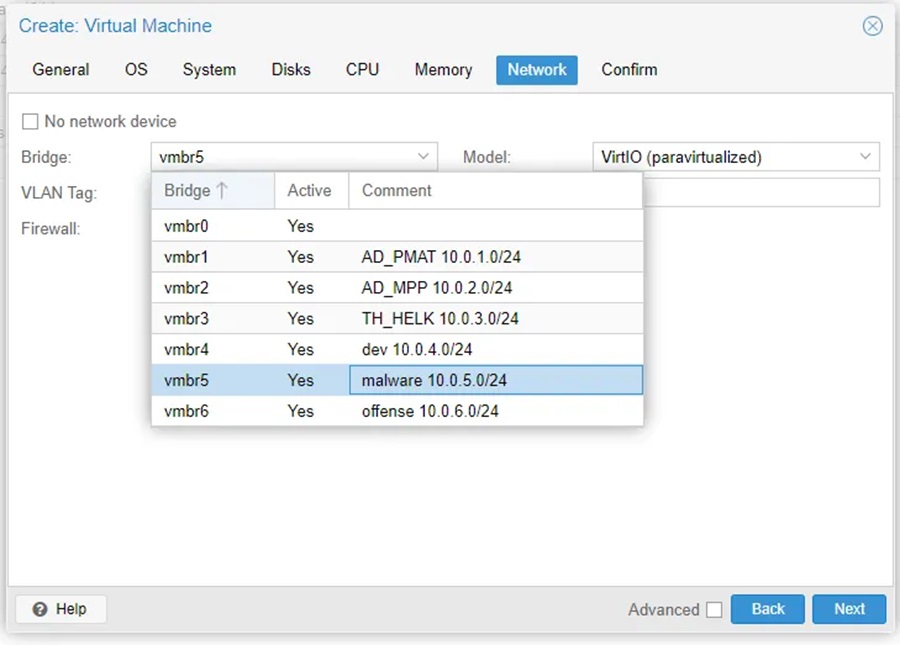
A Linux bridge setup for a subnet dedicate to a malware environment (i.e. vmbr5):
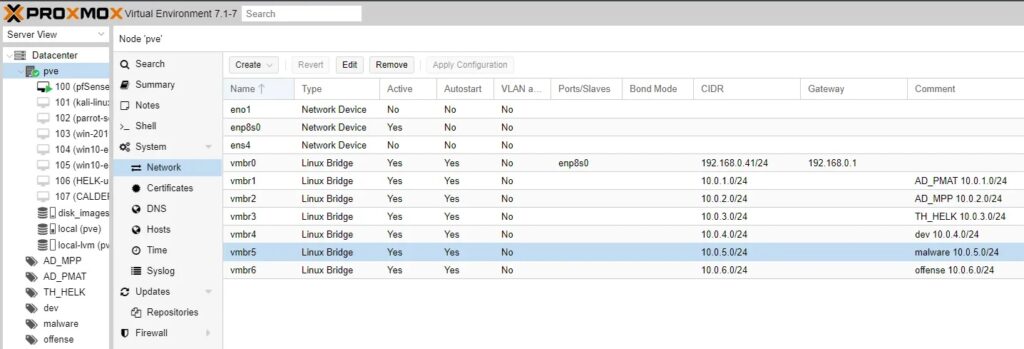
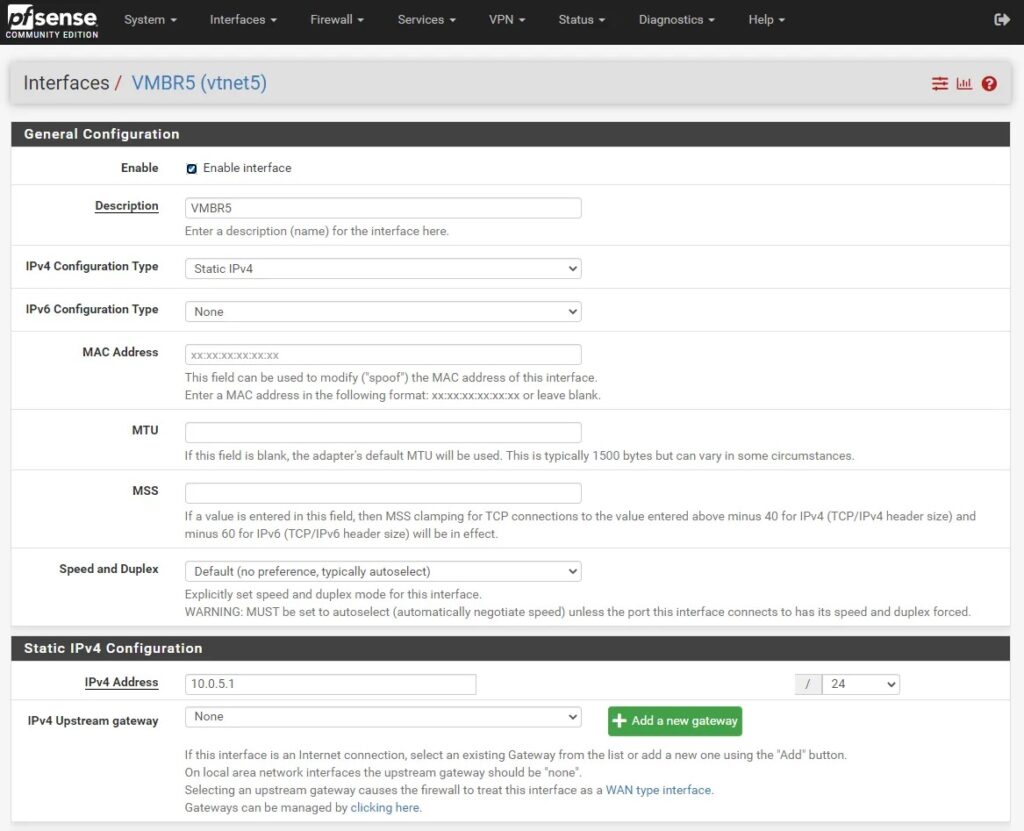
An interface setup in pfSense for the Linux bridge to connect through:
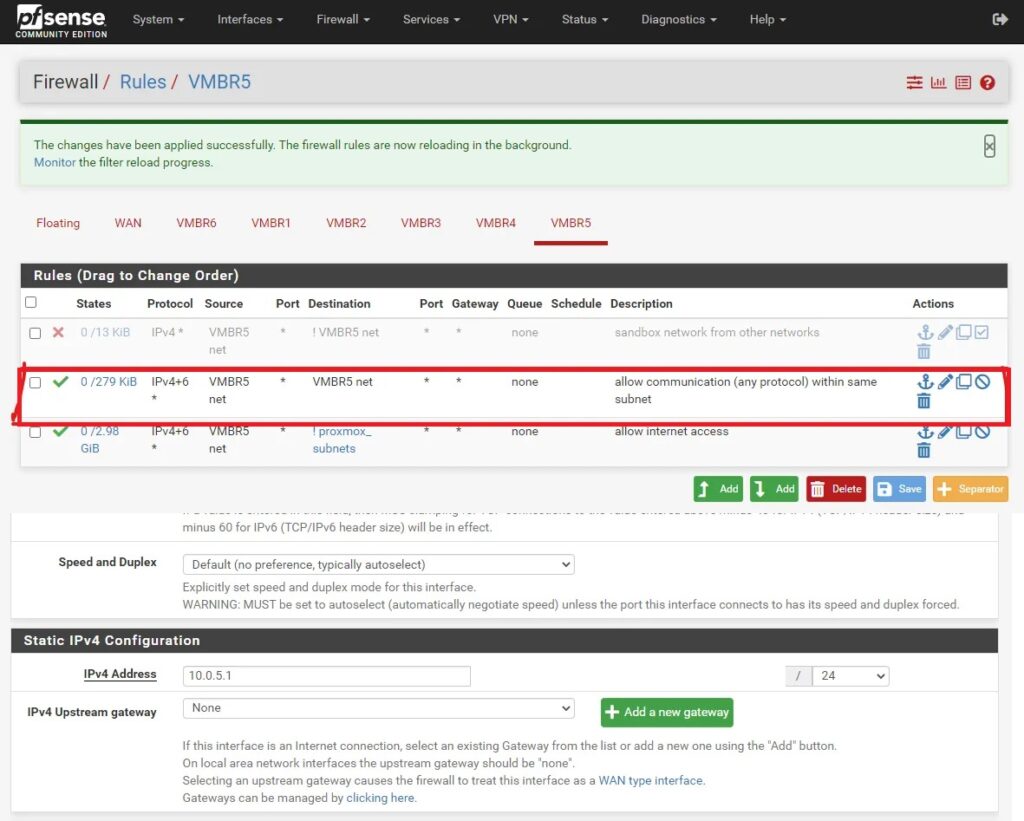
A pfSense rule allowing hosts in the malware subnet to connect to the Internet (temporarily):
REMnux Setup
To begin with we’ll configure REMnux. This is a “Linux Toolkit for Malware Analysis” which provides a range of useful tools for performing reverse engineering and malware analysis. To deploy this VM you can download the OVA image to your local machine and then import it as a virtual disk for a pre-created virtual machine.
An article detailing these steps can be found here.
You can choose the install from scratch option and download a Ubuntu 20.04 ISO image, install it as a VM, and run through the REMnux installer.
Instructions on running the installer can be found here and details on creating a VM in Proxmox can be found in my previously linked Medium article.
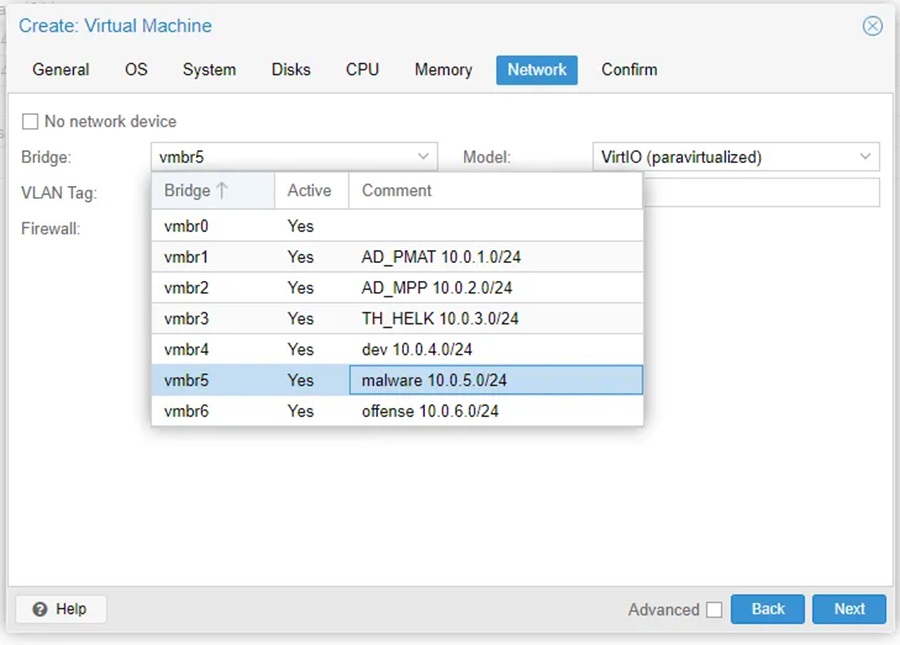
Either way, once installed you need to tune some Proxmox settings to get the best VM experience possible (details). Once this is complete you need to ensure that the VM is connected to the correct network bridge (i.e. vmbr5 and the 10.0.5.0/24 subnet). This can be done when you create the VM or after.
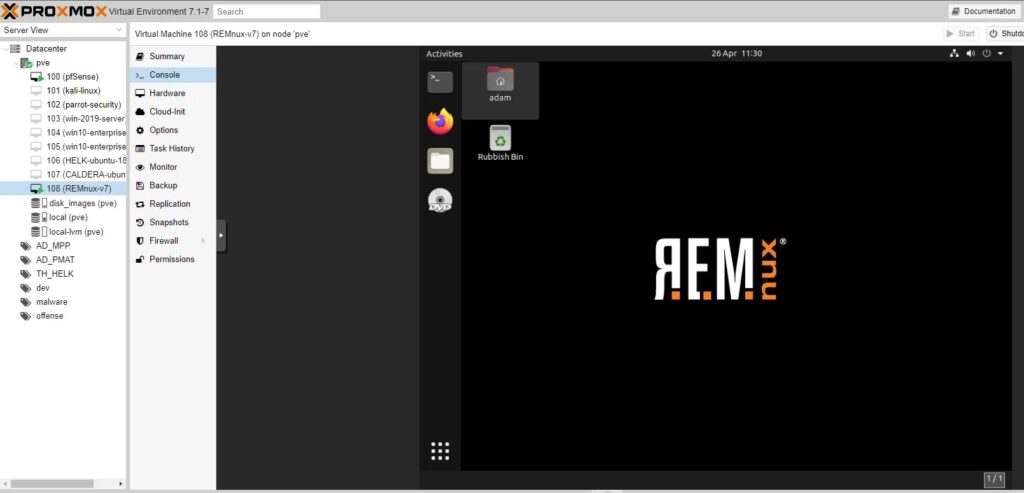
Now you can start the VM and login with the default credentials remnux:malware or with the user you created if REMnux was installed “from scratch”.
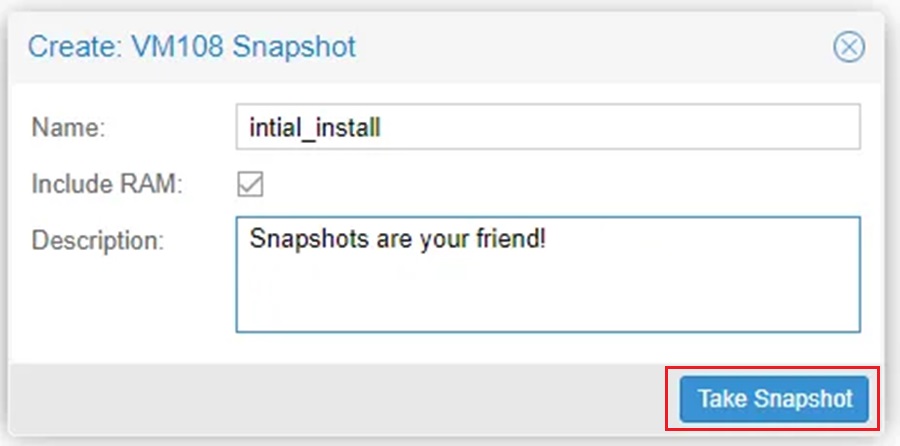
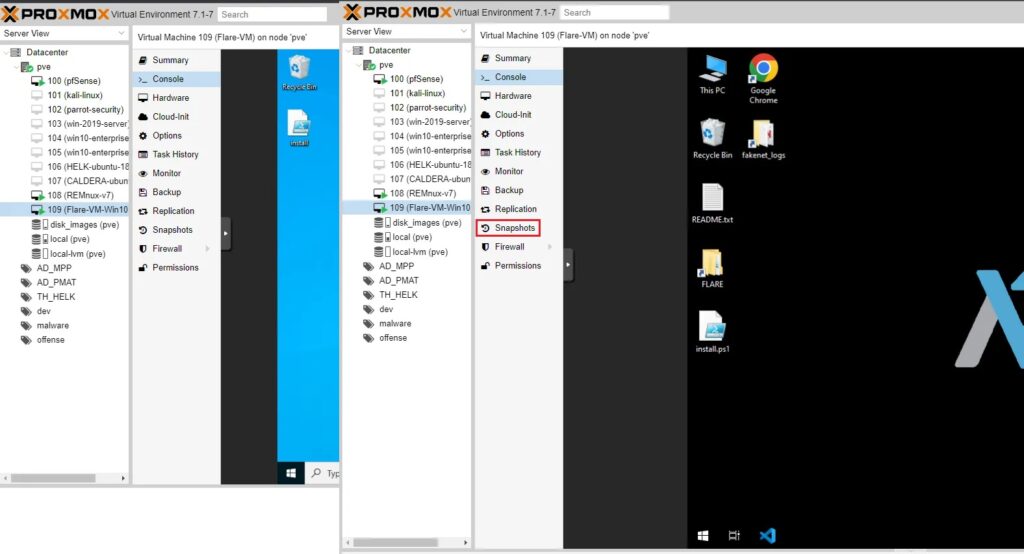
Remember to take a snapshot of this initial install with everything working!
This can be done in Proxmox under the Snapshots tab of your REMnux VM.
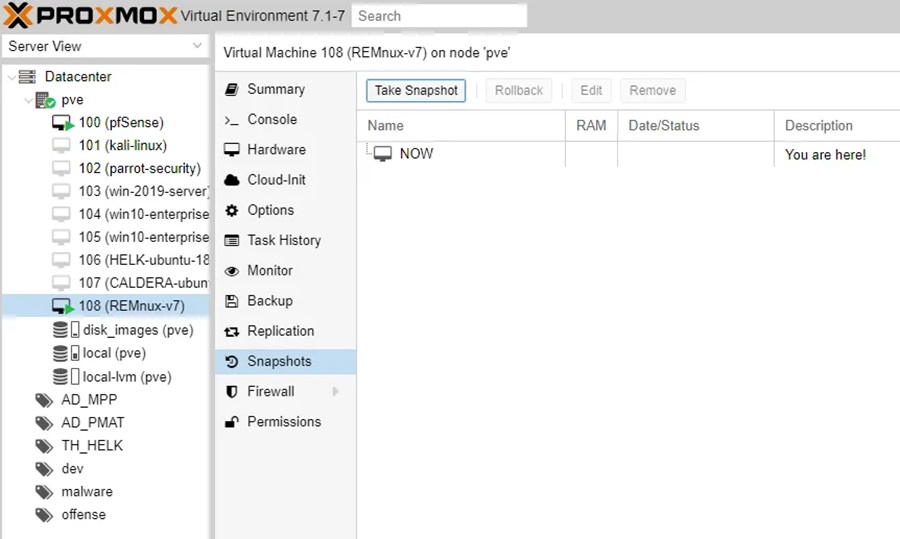
Click Take Snapshot to confirm.
Flare-VM
Next we’ll setup Flare-VM. This is a “Windows-based security distribution designed for reverse engineers, malware analysts, incident responders, forensicators, and penetration testers”, which makes it the perfect host to detonate malware on targets Windows machines.
This is most malware because malware authors have a deep hatred for Windows (or something to do with Windows having the largest market share).
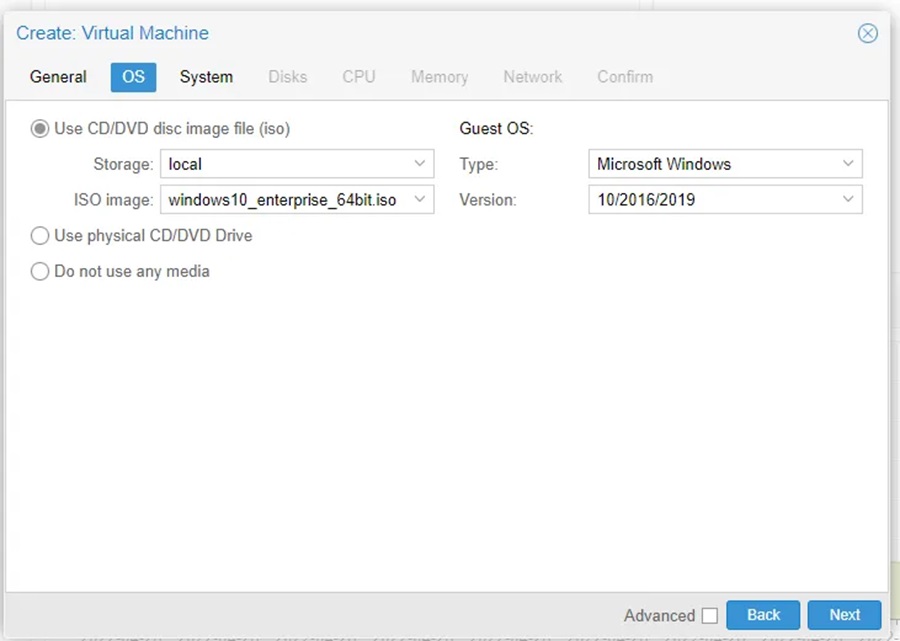
Installation instructions can be found on the project’s GitHub page. I simply downloaded a fresh Windows 10 ISO, installed it as a VM, ran the installation script provided on GitHub, and disabled the Windows settings outlined. I would recommend following Proxmox’s Windows 10 guests best practices when provisioning your VM.
Step 1: Create the virtual machine.
Step 2: Add the virtual machine to the malware analysis subnet (i.e. the vmbr5 network interface).
Step 3: Run the Flare-VM PowerShell installation script by opening Windows PowerShell as Administrator on the current user’s Desktop and running the following commands:
Set-ExecutionPolicy Unrestricted
.\install
Select [A] Yes to All > enter the user’s admin password > select the defaults.
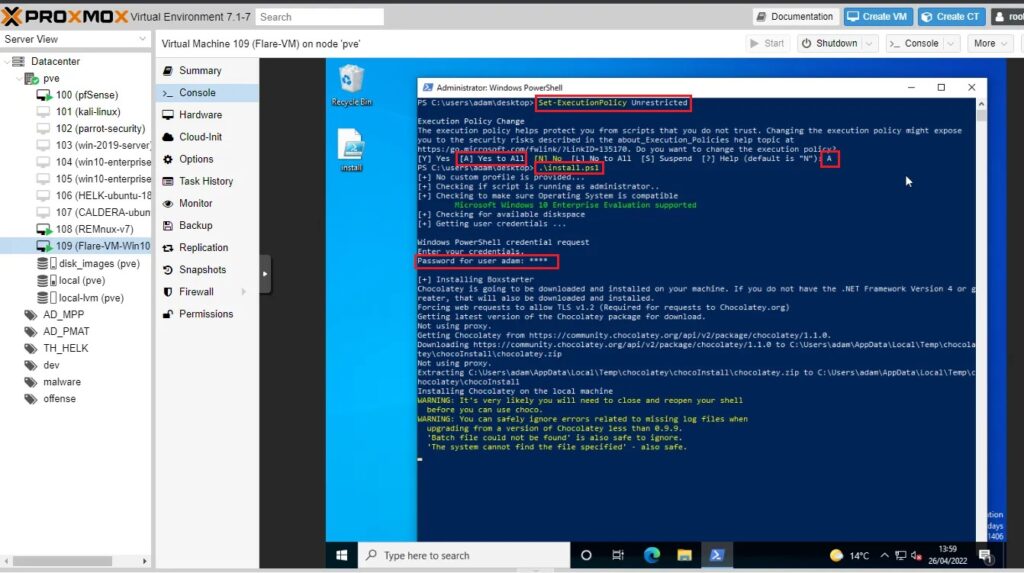
Once installed (and it may take a while) remember to take a snapshot of the VM once again!
Firewall Rules
Now with a Linux and Windows VM installed for our malware analysis purposes, we can begin detonating malware! Well not quite. To make the lab environment safe and secure we need to fine tune some network settings so our malware samples don’t escape our sandbox and infect our host machine.
To do this, login to pfSense (see this article if you don’t have pfSense installed).
Make the following firewall changes in Firewall > Rules > VMBR5:
- Block any host within the malware subnet (VMBR5) from communicating with any host which is NOT within this subnet. This is important because we don’t want any of the malware samples we detonate communicating with other networks/machines outside of this sandboxed malware network.
- Allow any host within the malware subnet (VMBR5) to communicate on any port with any other host within this subnet. This is needed so that we can setup fake Internet connections with tools like INetSim on our REMnux machine so malware we detonate on our Windows machine thinks it can connect to the Internet. This allows us to monitor for those precious network-based indicators like IP addresses, DNS requests, second stage payloads, etc.
- Allow Internet access. This rule is disabled by default but you may need to enable it to allow hosts to download files/updates at certain times.
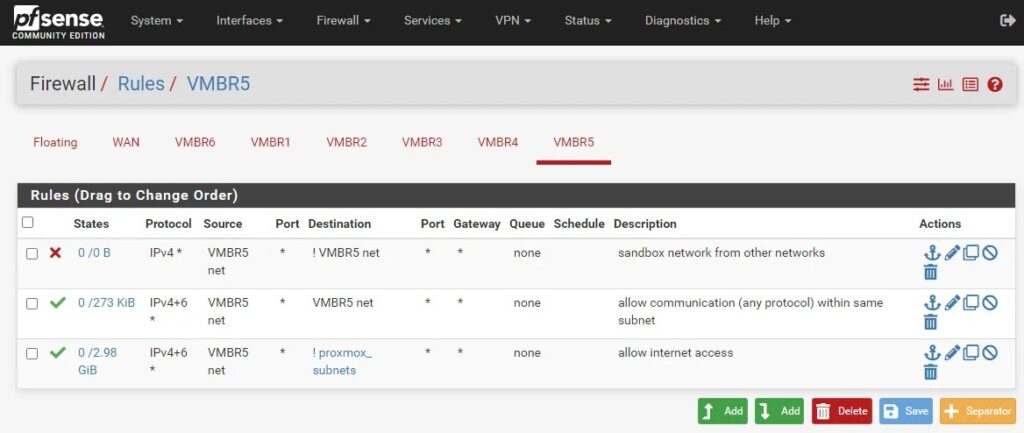
These new firewall rules should keep you host machine (and home network) safe from the malware you plan to detonate. This is assuming the malware you’re handling cannot escape a virtualization platform like Proxmox and if you keep Proxmox up-to-date you should be okay (let’s really hope so).
Now enjoy detonating and analysing malware to your heart’s content!
Whenever you need a clean analysis environment simply revert back to the snapshots you previously created.
Discover more in the Creating a Testing Environment series!
