Welcome back to this series on building threat hunting tools. In this series, I will be showcasing a variety of threat hunting tools that you can use to hunt for threats, automate tedious processes, and extend to create your own toolkit!
Most of these tools will be simple, focusing on being easy to understand and implement. This is so that you can learn from these tools and begin to develop your own. There will be no cookie-cutter tutorial on programming fundamentals like if statements and for loops. This series will focus on the practical implementation of scripting through small projects.
You are encouraged to play with these scripts, figure out ways to break or extend them, and try to improve their basic design to fit your needs. I find this the best way to learn any new programming language/concept and, certainly, the best way to derive value!
In this installment, you will learn how to create a Jupyter Notebook that you can use to query your MISP instance. This will drastically speed up your threat intelligence operations! If you are unsure what this means, don’t worry. All will be revealed.
You can find the code showcased on GitHub.
What are Jupyter Notebooks?

Jupyter Notebooks have been dubbed “interactive documentation.” They allow you to create and share documents that contain a mixture of code and Markdown content in a series of cells. A user of the Notebook can then read the Markdown content and execute the code as they work their way through.
Markdown is a lightweight markup language that adds formatting and structure to plaintext. You may have seen it before on sites like GitHub and Gitlab to format code documentation. To learn about its common elements, read this guide.
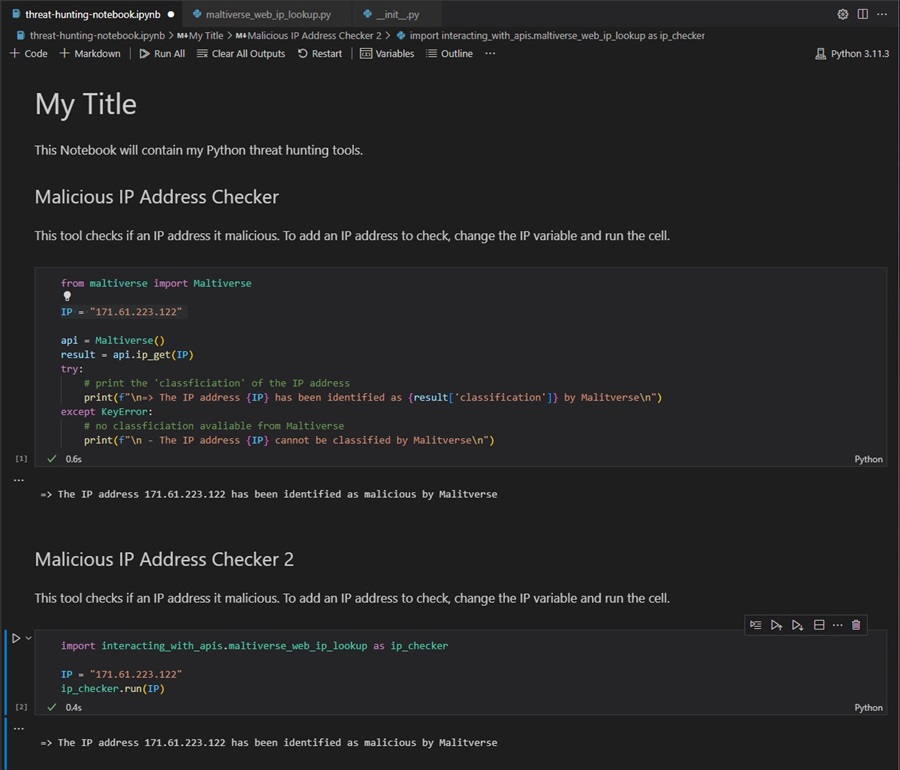
Jupyter Notebooks are also a great tool for prototyping your threat hunting tools and organizing them into a single location to seamlessly integrate your tools into your workflow. For instance, you may include the browser automation tool we created to perform threat hunts (along with Markdown text that describes how to use it) and follow this with the Maltiverse API tool so you can check if any unknown IP address you come across is malicious.
This is how I use Jupyter Notebooks as a senior threat intelligence analyst. Our team builds and maintains Python tools that we integrate with a shared Jupyter Notebook. An analyst will go through this Notebook and run the custom-built tools as part of their daily tasks. One tool automates running threat hunting queries for our EDR solution, another for our SIEM, and another can be used to check if an IP/domain/URL/file is malicious. This shared document contains Markdown text about using each tool and the checks an analyst should perform.
Jupyter Notebooks have made our small team incredibly efficient by providing a shared medium for automating our daily tasks and documenting our standard operating procedures.
Another great feature of Jupyter Notebooks is their support for data visualization. They are often used for data analysis because of their support for Python data analysis libraries like pandas and data visualization libraries like Matplotlib. This is what we will be using them for today!
What is MISP?

MISP (Malware Information Sharing Platform and Threat Sharing) is an open-source threat intelligence platform that allows you to share, collate, analyze, and distribute threat intelligence. It is used by finance, healthcare, telecommunications, government, and technology organizations to share and analyze information about the latest threats. Security researchers, threat intelligence teams, incident responders, and the wider cyber security community all use MISP to collaborate in their defensive efforts.
The platform provides a structured and standardized framework for collecting, storing, and sharing threat intelligence data, enabling collaboration and enhanced defense against cyber threats. It has mappings with existing threat intelligence frameworks (e.g., MITRE ATT&CK, CAPEC, etc.) and strong integrations with security products (e.g., CrowdStrike Falcon, Intel471, etc.). MISP is the defacto open-source threat intelligence platform mature organizations use to track threats and collaborate.
You can learn more about MISP in my Threat Intelligence with MISP series. This series teaches you everything you need to know to use the platform and build your MISP instance to gather, analyze, and share threat intelligence. Start with Threat Intelligence with MISP: Part 1 — What is MISP?
The Problem
As a threat intelligence analyst, you use MISP on a daily basis to gather, analyze, and share threat intelligence. You upload Indicators of Compromise (IOCs) and tactics, techniques, & procedures (TTPS) from threat intelligence reports, store intelligence about past incidents your organization has faced, and automatically ingest open-source threat intelligence feeds to the platform. This is a lot of data!
You need a way to efficiently query, analyze, and visualize this data, ideally from a single pane of glass. Your solution must allow you to perform various operations against your MISP instance, all from a single screen, and be shareable with others with less scripting/programming knowledge. Of course, your choice is the MISP API and Jupyter Notebooks!
The Solution
The MISP API is an incredibly useful feature of MISP that you can leverage to query your MISP instance programmatically. You can use the power of Python and Juptyer Notebooks to build small code snippets that use the API to:
- Search for IOCs.
- Show statistics relating to your MISP instance.
- Find common TTPs and filter results by tag.
- Export a list of IOCs to block or alert using your Intrusion Detection System (IDS) or other security tools.
- And more!
Performing all of these actions programmatically, from a single pane of glass, streamlines your workflow as a threat intelligence analyst and allows you to perform data analysis and visualization tasks easily.
Let’s get started creating a Jupyter Notebook for MISP!
You can learn more about the MISP API in Threat Intelligence with MISP Part 6 - Using the API.
Connecting to the API
First, you need to authenticate to the MISP API. To do this, you must create an Authentication Key in your MISP instance by going to Administration > List Auth Keys and clicking the Add authentication key button in the MISP web interface.

This is discussed in-depth in Threat Intelligence with MISP Part 6 – Using the API, so I won’t rehash it here. Once you have your key, you can use the code below to authenticate to the MISP API and create a Python object to perform your MISP API queries with:
# Step 1
from pymisp import PyMISP
from pprint import pprint
import matplotlib_inline
import pandas as pd

# Step 2
from config import config

# Step 3
MISP_URL = config.MISP_URL
MISP_KEY = config.MISP_KEY
MISP_VERIFYCERT = config.MISP_VERIFYCERT
misp = PyMISP(MISP_URL, MISP_KEY, MISP_VERIFYCERT, debug=False)
This code does several things:
- It imports several Python libraries that we will use to interact with the MISP API and perform data analysis and visualization.
- It imports a Python dataclass named
configfrom a Python module namedconfigand uses fields defined within this class. This keeps the sensitive credential information separate from the Jupyter Notebook to prevent any data leaks when sharing your Notebook with colleagues. You can replace these variables with your own data if you do not plan on sharing your Notebook. - It creates a Python object named
mispthat contains methods to interact with the MISP API.
Here is how it looks in the Jupyter Notebook in Microsoft Visual Studio Code. You can click the play button on the left side to execute the cell and connect to your MISP instance. Remember to create the MISP_URL and MISP_KEY variables with your own MISP data.
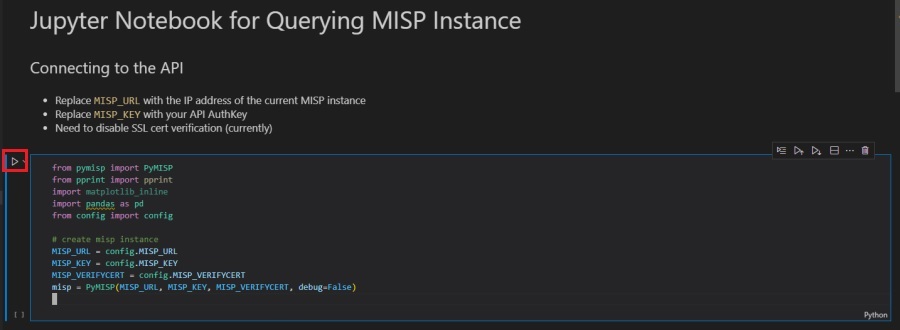
You can add config.py to a .gitignore file to prevent it from being uploaded to your version control system. Check out this article to learn more about gitignore files.
Searching for IOCs
You can use the MISP API to search for attributes in your MISP instance. MISP attributes are IOCs associated with a particular piece of threat intelligence (a MISP event). To search for them, use the misp object’s .search() method.
# Step 1
IOC = "oxcdntech.com"

# Step 2
response = misp.search(value=IOC)

# Step 3
if response:
    print("--- Matching Event ---")
    print(f"Event ID: {response[0]['Event']['id']}")
    print(f"Event Info: {response[0]['Event']['info']}")
    print(f"Date Added: {response[0]['Event']['date']}")
    print(f"Tags: {response[0]['Event']['date']}")

    for tag in response[0]['Event']['Tag']:
        print(f"- {tag['name']}")

    print("-" * 20)

else:
   # Step 4
    print(f"The IOC {IOC} is not in MISP")
This code does the following:
- Creates a variable named
IOCthat contains the value oxcdntech.com. This will be the attribute (IOC) you are searching for. - Queries the MISP API using the
mispobject’s.search()method and saves the response in a variable namedresponse. - Checks to see if the response returned is
True(not empty) and, if so, uses Python dictionary bracket notation to extract the data from the response returned by the MISP API. The Python library that interacts with the API (PyMISP) returns results in a Python dictionary, which you can use regular Python code to manipulate. The code prints this out for you. - If the response is
False(empty), the code just prints that the IOC is not in the MISP instance.
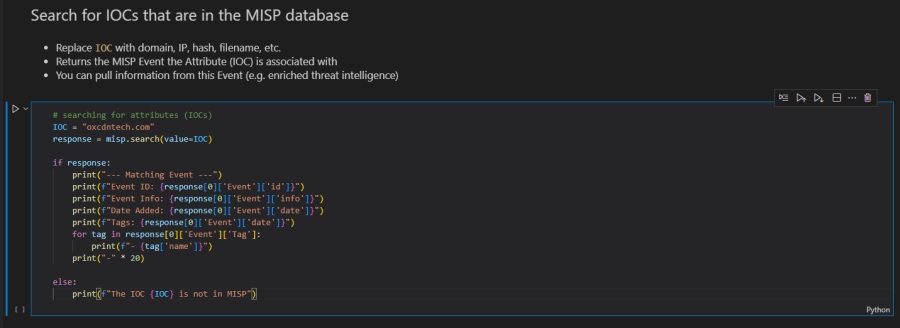
Here is how it looks in the Jupyter Notebook. Executing this code cell will search your MISP instance and return any associated MISP events that have an attribute matching IOC.
Showing Statistics About Your MISP Instance
You can get data from the MISP API about general statistics, tags, and attributes related to your MISP instance. This is useful to get a general understanding of what is in your MISP instance, particularly when you use custom tags to bucket your threat intelligence. You can use the misp object’s .users_statistics(), .tags_staticstics(), and .attributes_statistics() methods to do this.
# Step 1
def general_statistics():
    res = misp.users_statistics()
    print("--- General Stats ---")
    print(f"Users: {res['stats']['user_count']}")
    print(f"Events: {res['stats']['event_count']}")
    print(f"- added this month: {res['stats']['event_count_month']}")
    print(f"Attributes: {res['stats']['attribute_count']}")
    print(f"- added this month: {res['stats']['attribute_count_month']}")
    print()

# Step 2
def tag_statistics():
    res = misp.tags_statistics()
    print("--- Tag Stats ---")
    print(f"Threat Intelligence Articles: " + res['tags']['cssa:origin="report"'])
    print(f"Manual Investigations: " + res['tags']['cssa:origin="manual_investigation"'])
    print(f"Past Incidents: " + res['tags']['past-incident'])
    print(f"Malware Research: " + res['tags']['software-research'])
    print()

# Step 3
def attribute_statistics():
    res = misp.attributes_statistics()
    print("--- Attribute Stats ---")
    values_all = list(res.values())
    total_all = 0

    for i in values_all:
        total_all += int(i)

    print(f"Total: {total_all}")

    total_endpoint = int(res['md5']) + int(res['sha1']) + int(res['sha256'])
    print(f"Endpoint Indicators: {total_endpoint}")
    print(f"- MD5 hash: {res['md5']}")
    print(f"- SHA1 hash: {res['sha1']}")
    print(f"- SHA256 hash: {res['sha256']}")

    totaL_network = int(res['domain']) + int(res['ip-dst']) + int(res['hostname']) + int(res['url']) + int(res['email-src'])

    print(f"Network Indicators: {totaL_network}")
    print(f"- domains: {res['domain']}")
    print(f"- ip addresses: {res['ip-dst']}")
    print(f"- hostnames: {res['hostname']}")
    print(f"- URLs: {res['url']}")
    print(f"- email address: {res['email-src']}")

# Step 4
print("=" * 25)
print("=== MISP Statistics ===")
print("=" * 25)
print()

general_statistics()
tag_statistics()
attribute_statistics()

print()
This code does the following:
- The
general_statistics()function uses themispobject’susers_statistics()method to query the MISP API for the count of users, events, and attributes, saving this to the res variable. It then uses Python dictionary bracket notation to extract these counts and prints the data. - The
tag_statistics()function uses themispobject’stags_statistics()method to query the MISP API for statistics about all the tags used by the MISP instance, saving this to the res variable. It then uses Python dictionary bracket notation to extract the event counts for specific tags and prints the data. - The
attribute_statistics()function uses themispobject’sattribute_statistics()method to query the MISP API for more detailed statistics about the attributes stored within the MISP instance, saving this to the res variable. It then uses Python dictionary bracket notation to extract the counts of endpoint indicators like hashes and network indicators like IP address, printing this data. - Finally, the code cell uses a few
print()statements to do some formatting and calls each of the statistics functions.
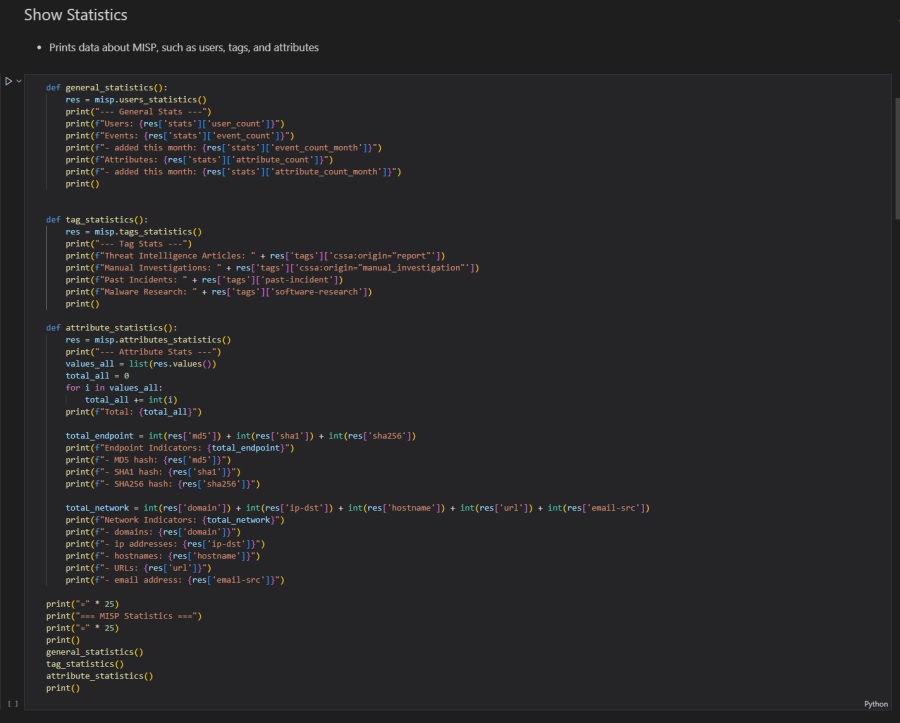
Here is how it looks in the Jupyter Notebook. Executing this code cell will run all three functions, returning data about users, events, attributes, and tags. A few print statements are used for formatting.
Finding Common TTPs
Let’s do something more complex. Whenever you upload a new threat intelligence report, incident, or piece of research to MISP, you can include additional context by adding a galaxy cluster on the View Event page. This additional context allows you to use shared threat intelligence frameworks or standardized lingo to describe your event, helping others understand and use it.
Read Threat Intelligence with MISP: Part 3 — Creating Events to learn about galaxy clusters.
Using the Attacker Pattern galaxy (under the mitre-attack), you can add data about the TTPs associated with an event. This is useful because it helps you track how threat actors attack systems and, by extension, how to defend against them.
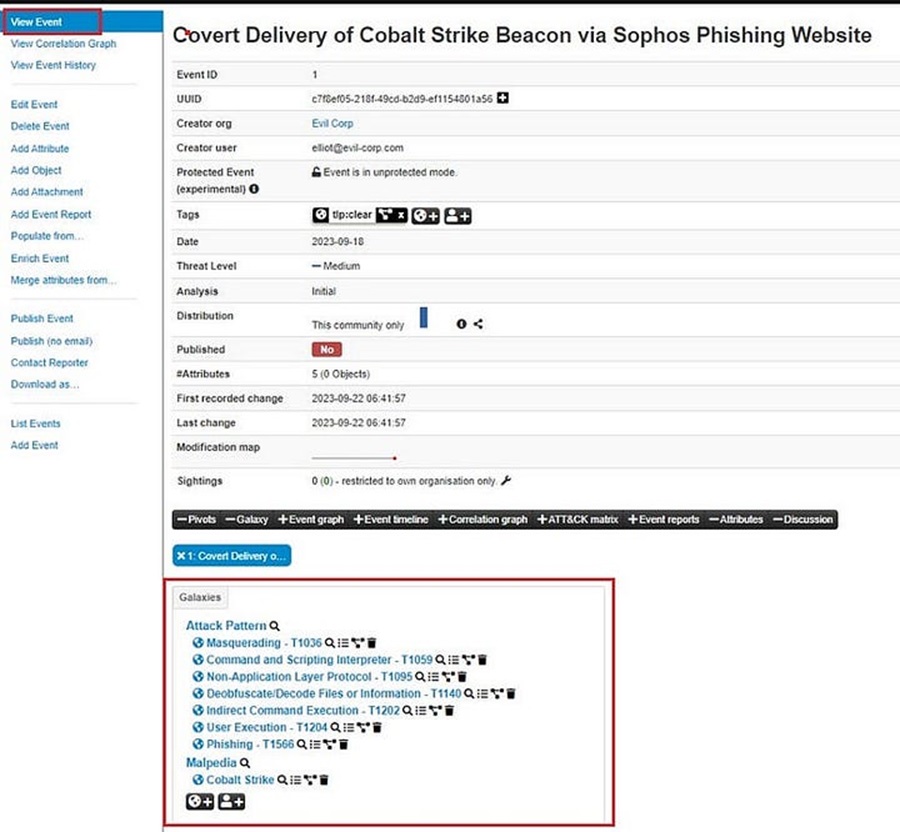
However, as defenders, our time and resources are usually limited, so we need to prioritize which TTPs we want to focus on defending against. A good starting point is finding what TTPs are most commonly used by threat actors targeting your organization and prioritizing those. You can use the MISP API to automate this by aggregating common TTPs and then visualizing the most common using the pandas Python data analysis library.
This approach is discussed in-depth in Threat Profiling: How to Understand Hackers and Their TTPs, where you can see how to perform common TTP aggregation and visualization manually using a spreadsheet.
Here is the code to do that.
# Step 1:
all = misp.search(controller="events")

# Step 2:
ttps = {
    "T1548" : 0,
    ...
    "T1220" : 0,

    }

# Step 3
for i in all:
    galaxies = i['Event']['Galaxy']
    for j in galaxies:
        if j['type'] == 'mitre-attack-pattern':
            for k in j['GalaxyCluster']:
                ttp = k['meta']['external_id'][0]
                if ttp in ttps:
                    ttps[ttp] += 1

# Step 4:
ttps_data = pd.Series(data=ttps, index=list(ttps.keys()))

# Step 5:
(ttps_data
    [lambda s: s>9]
    .plot.barh()
)
This code does the following:
- Uses the
mispobject’s.search()method to return all the MISP events and saves them into a variable called all. - Creates a Python dictionary containing MITRE ATT&CK TTPs mapped to a count (redacted for brevity).
- Loops through all events and increases the count of the TTP in the dictionary if the
GalaxyClustertag matches. It uses dictionary bracket notation to parse galaxy cluster information. - Transforms the Python dictionary into a pandas series object.
- Plots the series object using a horizontal bar graph so you can visualize the data. This code only plots TTPs that are seen more than 9 times within your MISP instance.
Here is how it looks in the Jupyter Notebook.
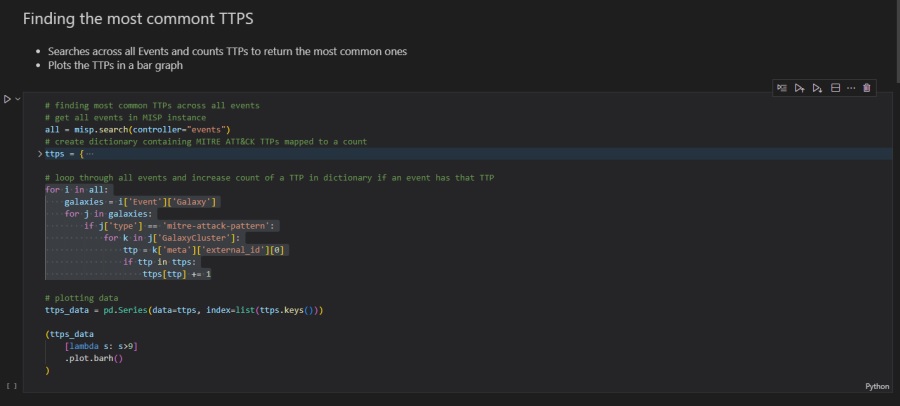
Once executed, you should see a nicely formatted horizontal bar graph in your Jupyter Notebook. This shows you the most common TTPs and, unlike a spreadsheet, will dynamically change when you add more events to your MISP instance.

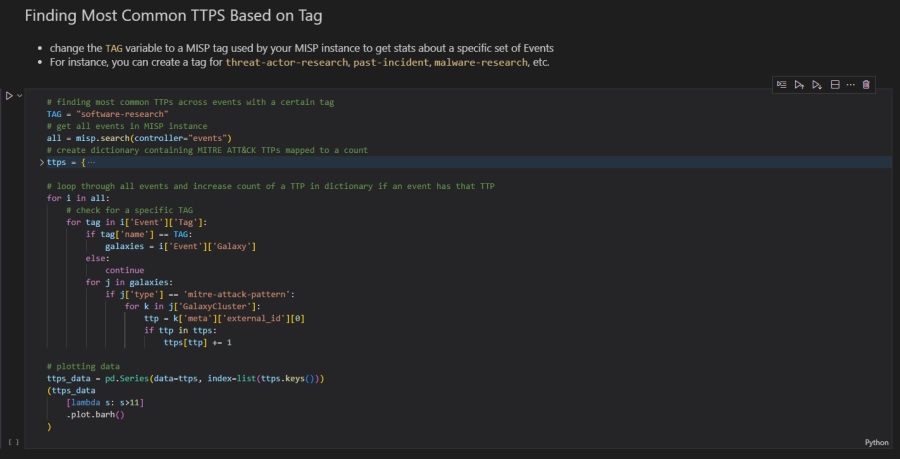
Changing the code slightly allows you to aggregate specific events based on their associated tag. Here, a TAG variable defines a specific MISP tag to aggregate and visualize TTPs against. For instance, the software-research tag is a custom tag I created to add data to MISP about malware I researched, including the TTPs said malware uses. The code lets me see the common TTPs exclusively related to this research data.
# finding most common TTPs across events with a certain tag
TAG = "software-research"

# get all events in MISP instance
all = misp.search(controller="events")

# create dictionary containing MITRE ATT&CK TTPs mapped to a count
ttps = {
    "T1548" : 0,
    ...
    "T1220" : 0,
}

# loop through all events and increase count of a TTP in dictionary if an event has that TTP
for i in all:
    # check for a specific TAG
    for tag in i['Event']['Tag']:
        if tag['name'] == TAG:
            galaxies = i['Event']['Galaxy']
        else:
            continue

        for j in galaxies:
            if j['type'] == 'mitre-attack-pattern':
                for k in j['GalaxyCluster']:
                    ttp = k['meta']['external_id'][0]
                    if ttp in ttps:
                        ttps[ttp] += 1

# plotting data
ttps_data = pd.Series(data=ttps, index=list(ttps.keys()))
(ttps_data

    [lambda s: s>9]

    .plot.barh()

)
Again, here is how it looks in the Jupyter Notebook.
Exporting a List of IOCs From Your MISP Instance
MISP is designed to be the single place where you gather, analyze, and share threat intelligence. Part of this sharing is the ability to export all of your MISP attributes as IOCs that you can upload to your IDS or other security solution to automatically block or trigger an alert when seen. To export all IOCs, you can use the misp object’s .search() method with a few new arguments.
# Step 1
from validators import ip_address

# Step 2
def GetMispAttributes(misp_url, misp_key, misp_verifycert):
    # Step 3
    misp = PyMISP(misp_url, misp_key, misp_verifycert, debug=False)

    # Step 4
    attributes = misp.search(controller='attributes', to_ids=1, pythonify=True, publish_timestamp='89d')

    # Step 5
    ipv4 = []
    ipv6 = []
    domain = []
    url = []
    hostname = []
    sha256 = []
    md5 = []
    sha1 = []
    other = []

    # Step 6
    for i in attributes:
        if (i.type == "ip-dst"):
            # check if IPv4 or IPv6
            if (ip_address.ipv4(i.value)):
                ipv4.append(i.value)
            elif (ip_address.ipv6(i.value)):
                ipv6.append(i.value)
            else:
                other.append(i.value)
        elif (i.type == "ip-dst|port"):
            addr = ipv4.append(i.value.split('|')[0])
            # check if IPv4 or IPv6
            if (ip_address.ipv4(addr)):
                ipv4.append(addr)
            elif (ip_address.ipv6(addr)):
                ipv6.append(addr)
            else:
                other.append(addr)
        elif (i.type == "domain"):
            domain.append(i.value)
        elif (i.type == "domain|ip"):
            # split domain an ip, append to respective lists
            domain.append(i.value.split('|')[0])
            addr = ipv4.append(i.value.split('|')[1])
            # check if IPv4 or IPv6
            if (ip_address.ipv4(addr)):
                ipv4.append(addr)
            elif (ip_address.ipv6(addr)):
                ipv6.append(addr)
            else:
                other.append(addr)
        elif (i.type == "url"):
            url.append(i.value)
        elif (i.type == "hostname"):
            hostname.append(i.value)
        elif (i.type == "hostname|port"):
            # split hostand and port
            hostname.append(i.value.split('|')[0])
        elif (i.type == "sha256"):
            sha256.append(i.value)
        elif (i.type == "filename|sha256"):
            # split filename and hash, append hash to sha256 list
            sha256.append(i.value.split('|')[1])
        elif (i.type == "md5"):
            md5.append(i.value)
        elif (i.type == "filename|md5"):
            # split filename and hash, append hash to md5 list
            md5.append(i.value.split('|')[1])
        elif (i.type == "sha1"):
            sha1.append(i.value)
        elif (i.type == "filename|sha1"):
            # split filename and hash, append hash to sha1 list
            sha1.append(i.value.split('|')[1])
        else:
            other.append(i.value)

    # Step 7
    ipv4_length = len(ipv4)
    ipv6_length = len(ipv6)
    domain_length = len(domain)
    url_length = len(url)
    hostname_length = len(hostname)
    sha256_length = len(sha256)
    sha1_length = len(sha1)
    md5_length = len(md5)

    # Step 8
    print(f"[+] Total MISP indicators: {ipv4_length + ipv6_length + domain_length + url_length + hostname_length + sha256_length + sha1_length + md5_length}")
    print(f"+++ Network Indicators +++ ")
    print(f"- IPv4 addresses: {ipv4_length}")
    print(f"- IPv6 addresses: {ipv6_length}")
    print(f"- Domains: {domain_length}")
    print(f"- URLs: {url_length}")
    print(f"- Hostnames: {hostname_length}")
    print(f"+++ Endpoint Indicators +++")
    print(f"- SHA256 hashes: {sha256_length}")
    print(f"- SHA1 hashes: {sha1_length}")
    print(f"- MD5 hashes: {md5_length}")
    print(f"[+] Total \"other\" IOCs: {len(other)}")
    print(f"[+] Total indicators to upload to CrowdStrike: {ipv4_length + ipv6_length + sha256_length + md5_length + domain_length}")

    # Step 9
    cs_indicators = {
        "ipv4": ipv4,
        "ipv6": ipv6,
        "domain": domain,
        "sha256": sha256,
        "md5": md5,
    }
    return cs_indicators

# Step 10
indicators = GetMispAttributes(MISP_URL, MISP_KEY, MISP_VERIFYCERT)
This code does the following:
- Imports the
ip_addressclass from the validators module. This is used later to check if an IP address is IPv4 or IPv6. - Creates a function called
GetMispAttributes()that connects to the MISP API and returns all attributes in a form the popular Endpoint Detection and Response (EDR) tool CrowdStrike Falcon can use. This means it returns only IP addresses, SHA256, MD5, and domains from your MISP instance. - Connects to the MISP API using the variables supplied to the function. You’ve seen this code before.
- Returns all attributes (
controller='attributes') from the MISP instance with the IDS flag set to true (to_ids=1) in a Python dictionary (pythonify=True). Also, only returns attributes with a publish timestamp within the last 89 days (puplish_timestamp='89d'). This data is saved to theattributesdictionary. - Creates lists for different IOC types. These are buckets the IOCs will be sorted into.
- Loops over all IOCs returned and sorts them into their respective buckets.
- Tallies the length of these lists. This is the IOC count for each bucket.
- Prints the totals for each IOC bucket.
- Returns a dictionary containing the IOC type name and a list of IOCs. This is in CrowdStrike form.
- The main body of the cell calls the
GetMispAttributes()function and saves the returned IOC dictionary. This dictionary can then be saved to a file or used with the CrowdStrike API. More on this in a future installment of the series.
How this looks in the Jupyter Notebook has been excluded for brevity. However, the entire Jupyter Notebook is ready to use on GitHub page as misp-data.ipynb.
Conclusion
Well done, you’ve discovered how to use the MISP API with Jupyter Notebooks to create a one-stop shop for interacting with MISP!
You learned how to connect to your MISP instance, search for IOCs, show statistics relating to your MISP instance, find common TTPs and filter results by tag, and export a list of IOCs to block or alert on in your Intrusion Detection System (IDS) or other security tools.
Try using this Jupyter Notebook with your MISP instance. Then, try expanding it by adding new code cells that provide further functionality. Can you export all the IOCs to a CSV file? Can you add new events and attributes using the API? Can you add or remove tags? Give it all a go, and let me know what you come up with!
The next installment in this series will show you how to integrate MISP with the popular Endpoint Detection and Response (EDR) tool CrowdStrike Falcon. You will learn how to automatically download your MISP IOCs and then upload them to CrowdStrike Falcon, all without touching a web interface. Till then, happy hunting!
Discover more in the Python Threat Hunting Tools series!


